Intro
Getting Started docs will help you land on your feet safely and orient yourself on the unfamiliar territory of our Web3 API platform in no time.
Here is your map to our basics:
Iterface schema—Public: basics—Premium: basics—Team accounts—Projects
Interface schema: your way around Web3 API interface.Public: basics: your way around Public endpoints for blockchain interaction.Premium: basics: your way around Premium endpoints for blockchain interaction.Team accounts: your way around team accounts structuring your business.Projects: your way around setting your projects and adding whitelists.
Interface schema
Here you'll find information on what you can expect from all the main panes you're working with on the Web3 API platform.
Here are panes you usually work with:
Chains list (Endpoints)—Andvanced API—Statistics—Settings—Billing
Chains list
Once you type down ankr.com/rpc in your browser and press Enter, you'll find yourself in the Chains list pane. This is your starting point to empower your Web3 project with blockchain interaction capabilities.
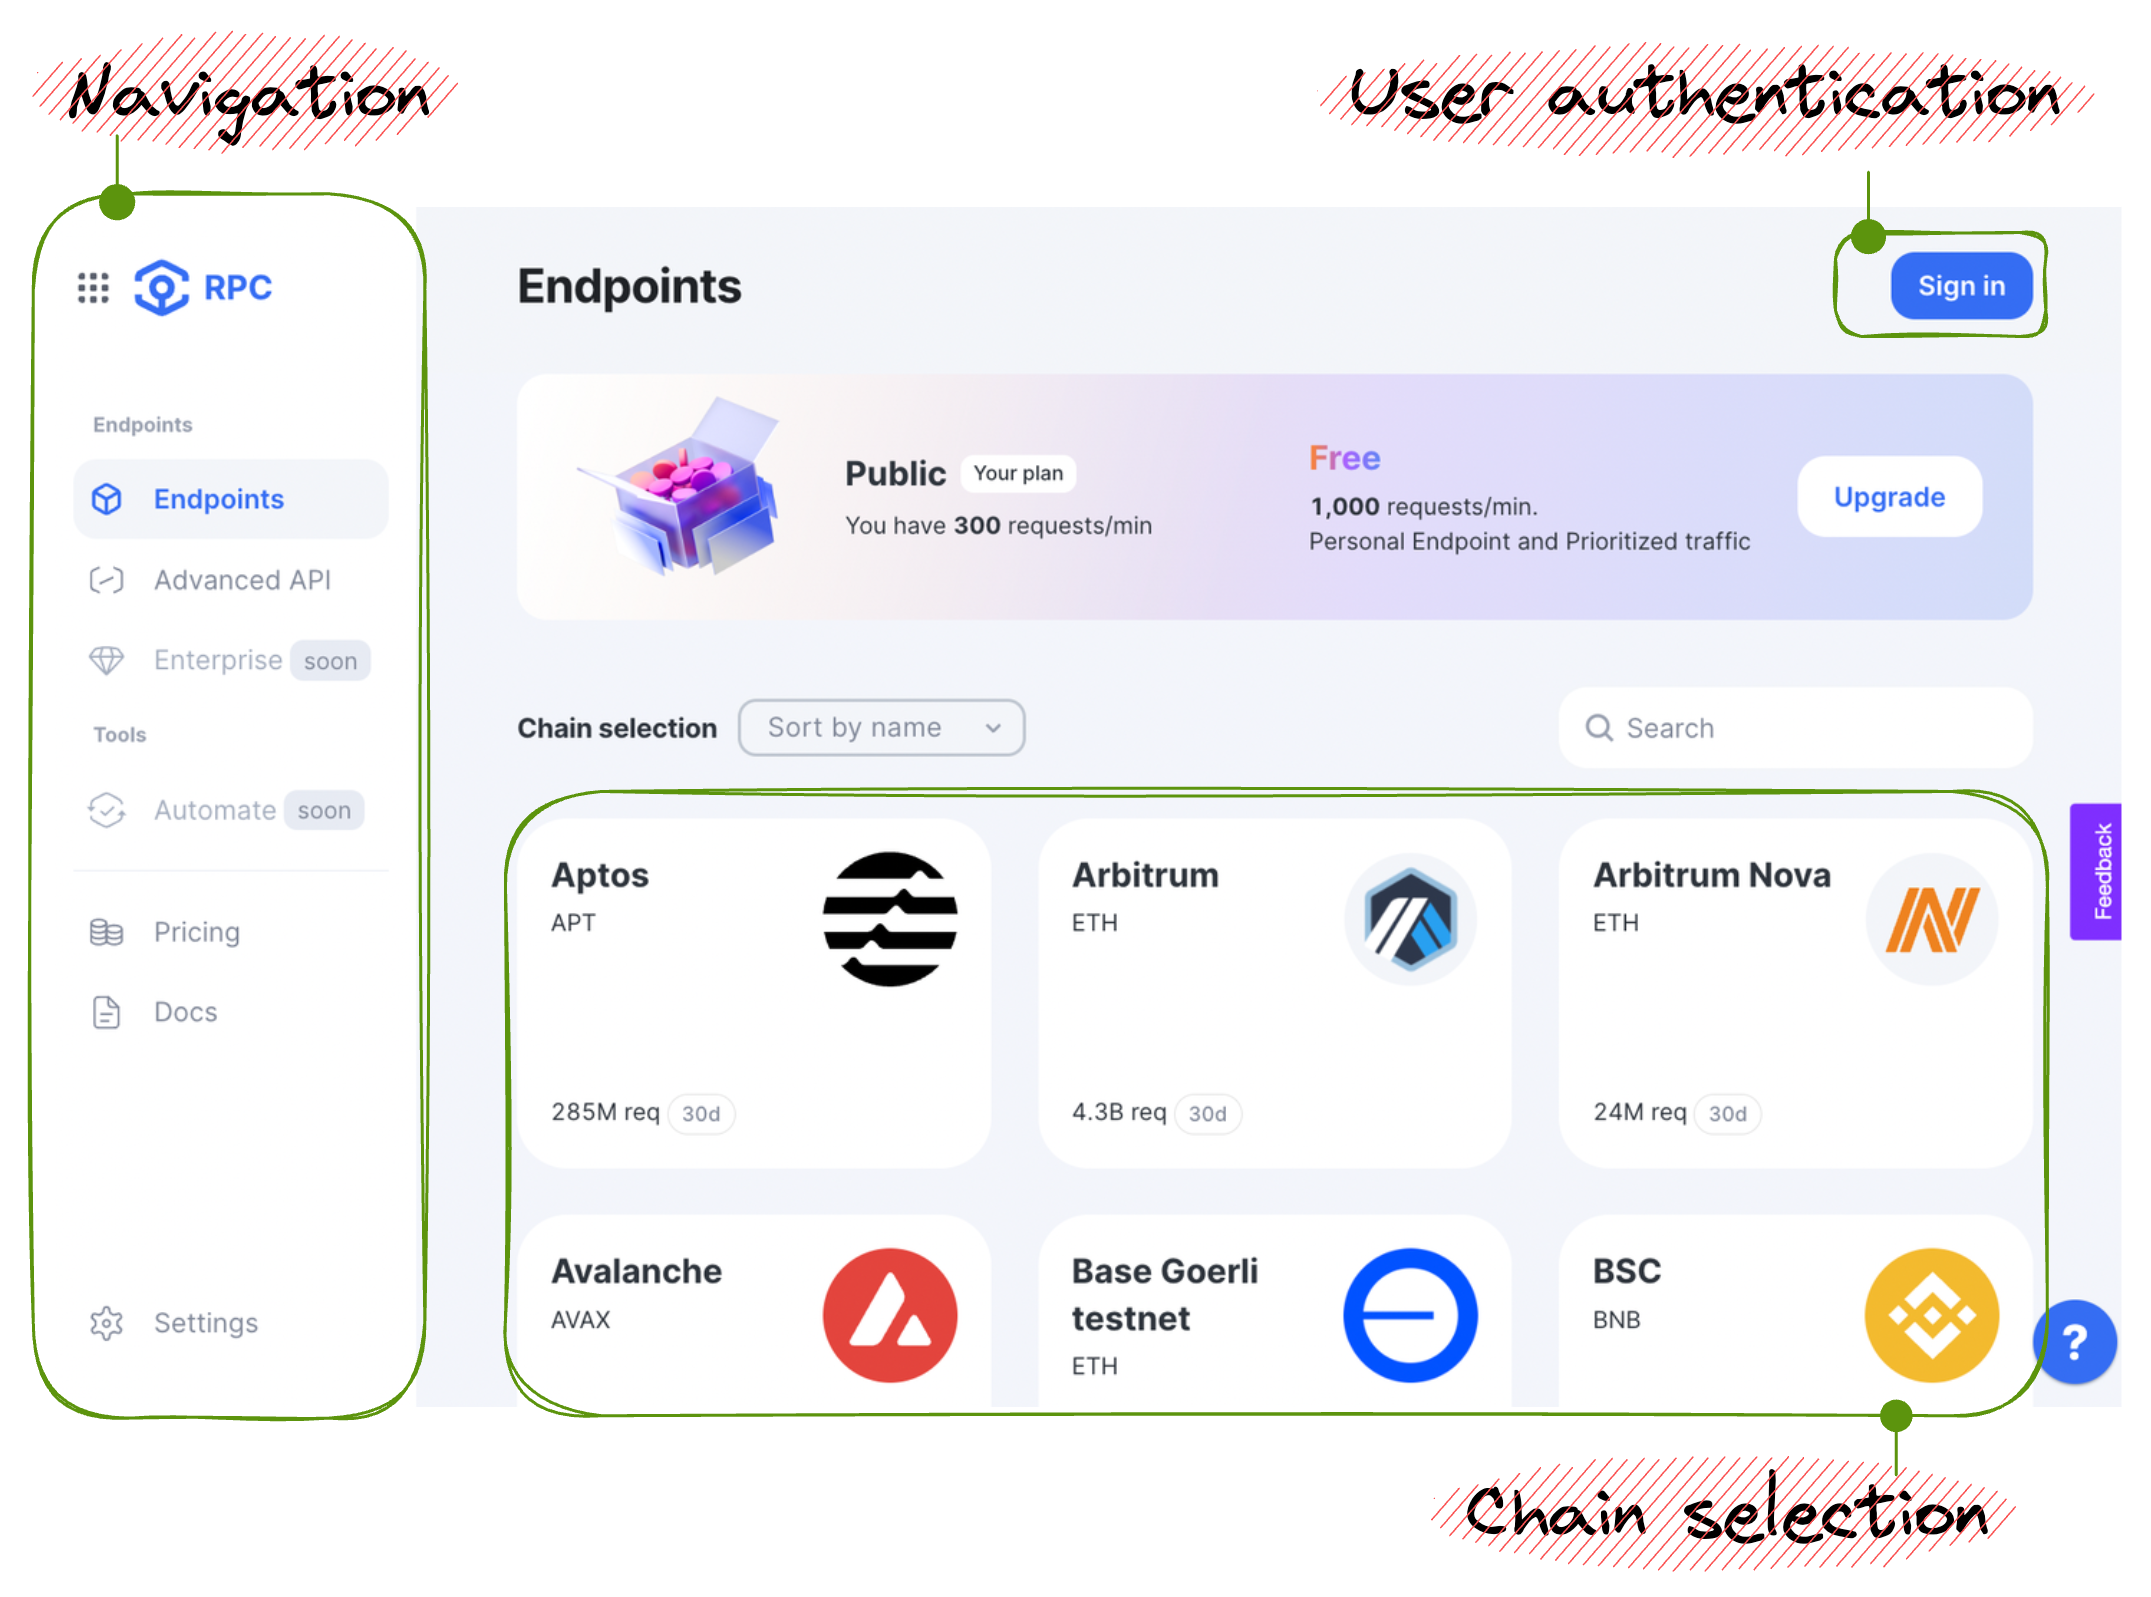
You usually start as a Public plan user, meaning that you haven't signed in to our platform yet and can only use free Node API endpoints with the corresponding features and rate limits available.
For a Public plan user, the following actions are available from the start:
- Navigation: selecting the pane to work with.
- User authentication: signing in to the platform to use Premium capabilities.
- Chains selection: selecting the chain to use Public endpoints for your project's blockchain interaction.
Advanced API
Available for both Freemium and Premium users.
The Advanced API (AAPI) functionality is intended for a more savvy and demanding user. Advanced API optimizes, indexes, caches, and stores blockchain data to make it access-ready for you. Some AAPI methods support simultaneous querying of multiple EVM-compatible blockchains in a single request.
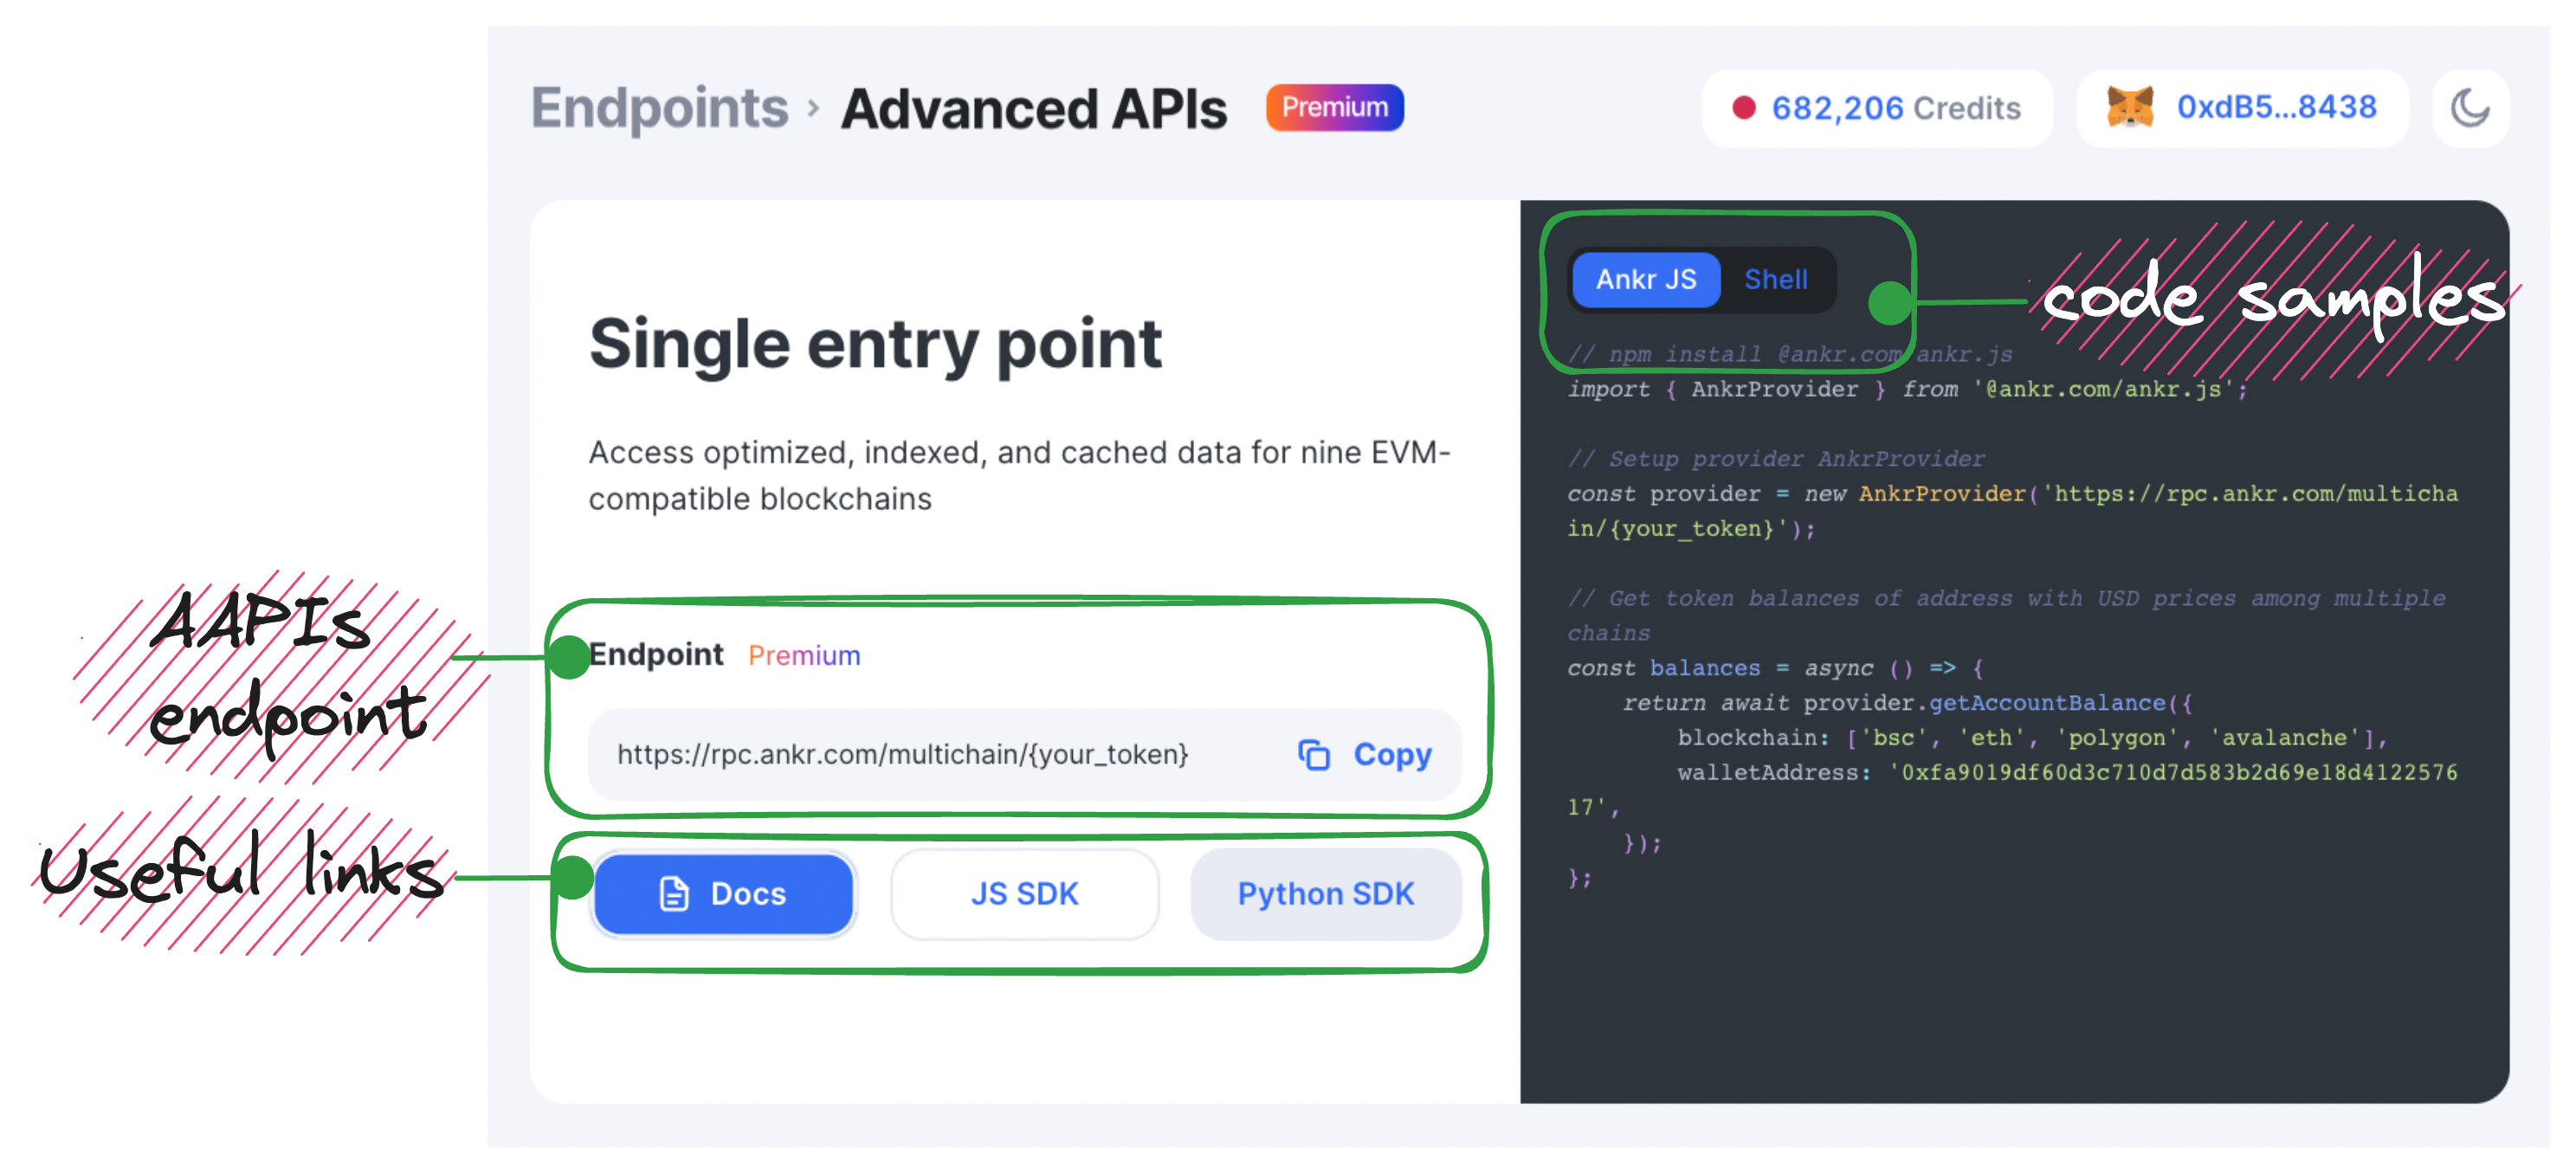
For a Freemium/Premium user, the blockchain interaction capabilities still revolve around using Node/Advanced API endpoints but start from a different angle — Projects — which in essence represent individual unique tokens to differentiate and group your private endpoints around a single particular scope of work.
The endpoint for the Freemium/Premium user can be schematically described by the following formula:
Endpoint=Project (API key)+Network
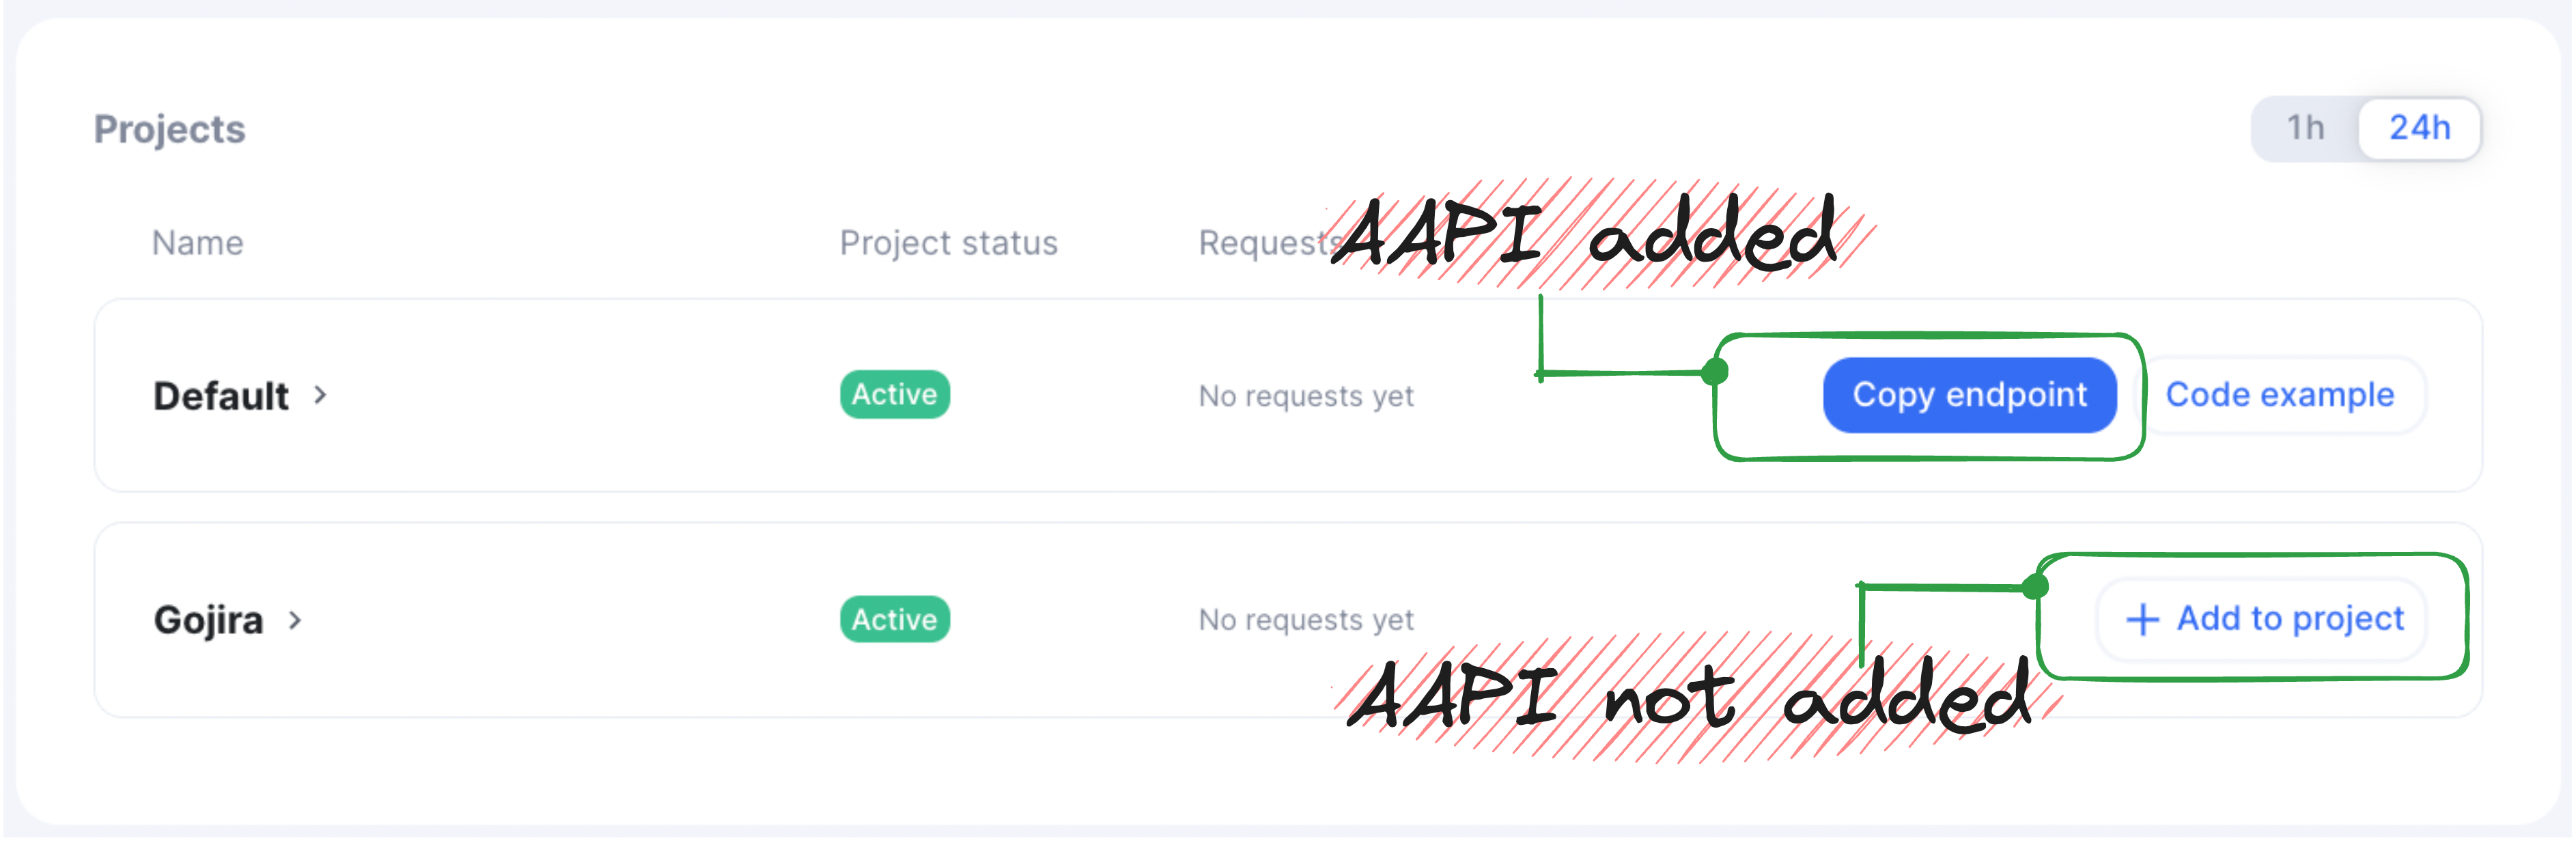
In terms of the things you can do in the Advanced API pane, it comes to the following options based on whether you've already added AAPI to a project or not:
- AAPI added: the project added with AAPI functionality will have the Copy endpoint button to copy and paste your endpoint into the source code.
- AAPI not added: the project not added with AAPI functionality will have the + Add to project button to create an endpoint which then can be copied into your source code.
Statistics
Available for both Freemium and Premium users.
To open the Statistics pane, follow these steps:
- Sign in to the Web3 API (opens in a new tab) platform.
- In Navigation, click Statistics to open the corresponding pane.
Congrats — you can now see your statistics.
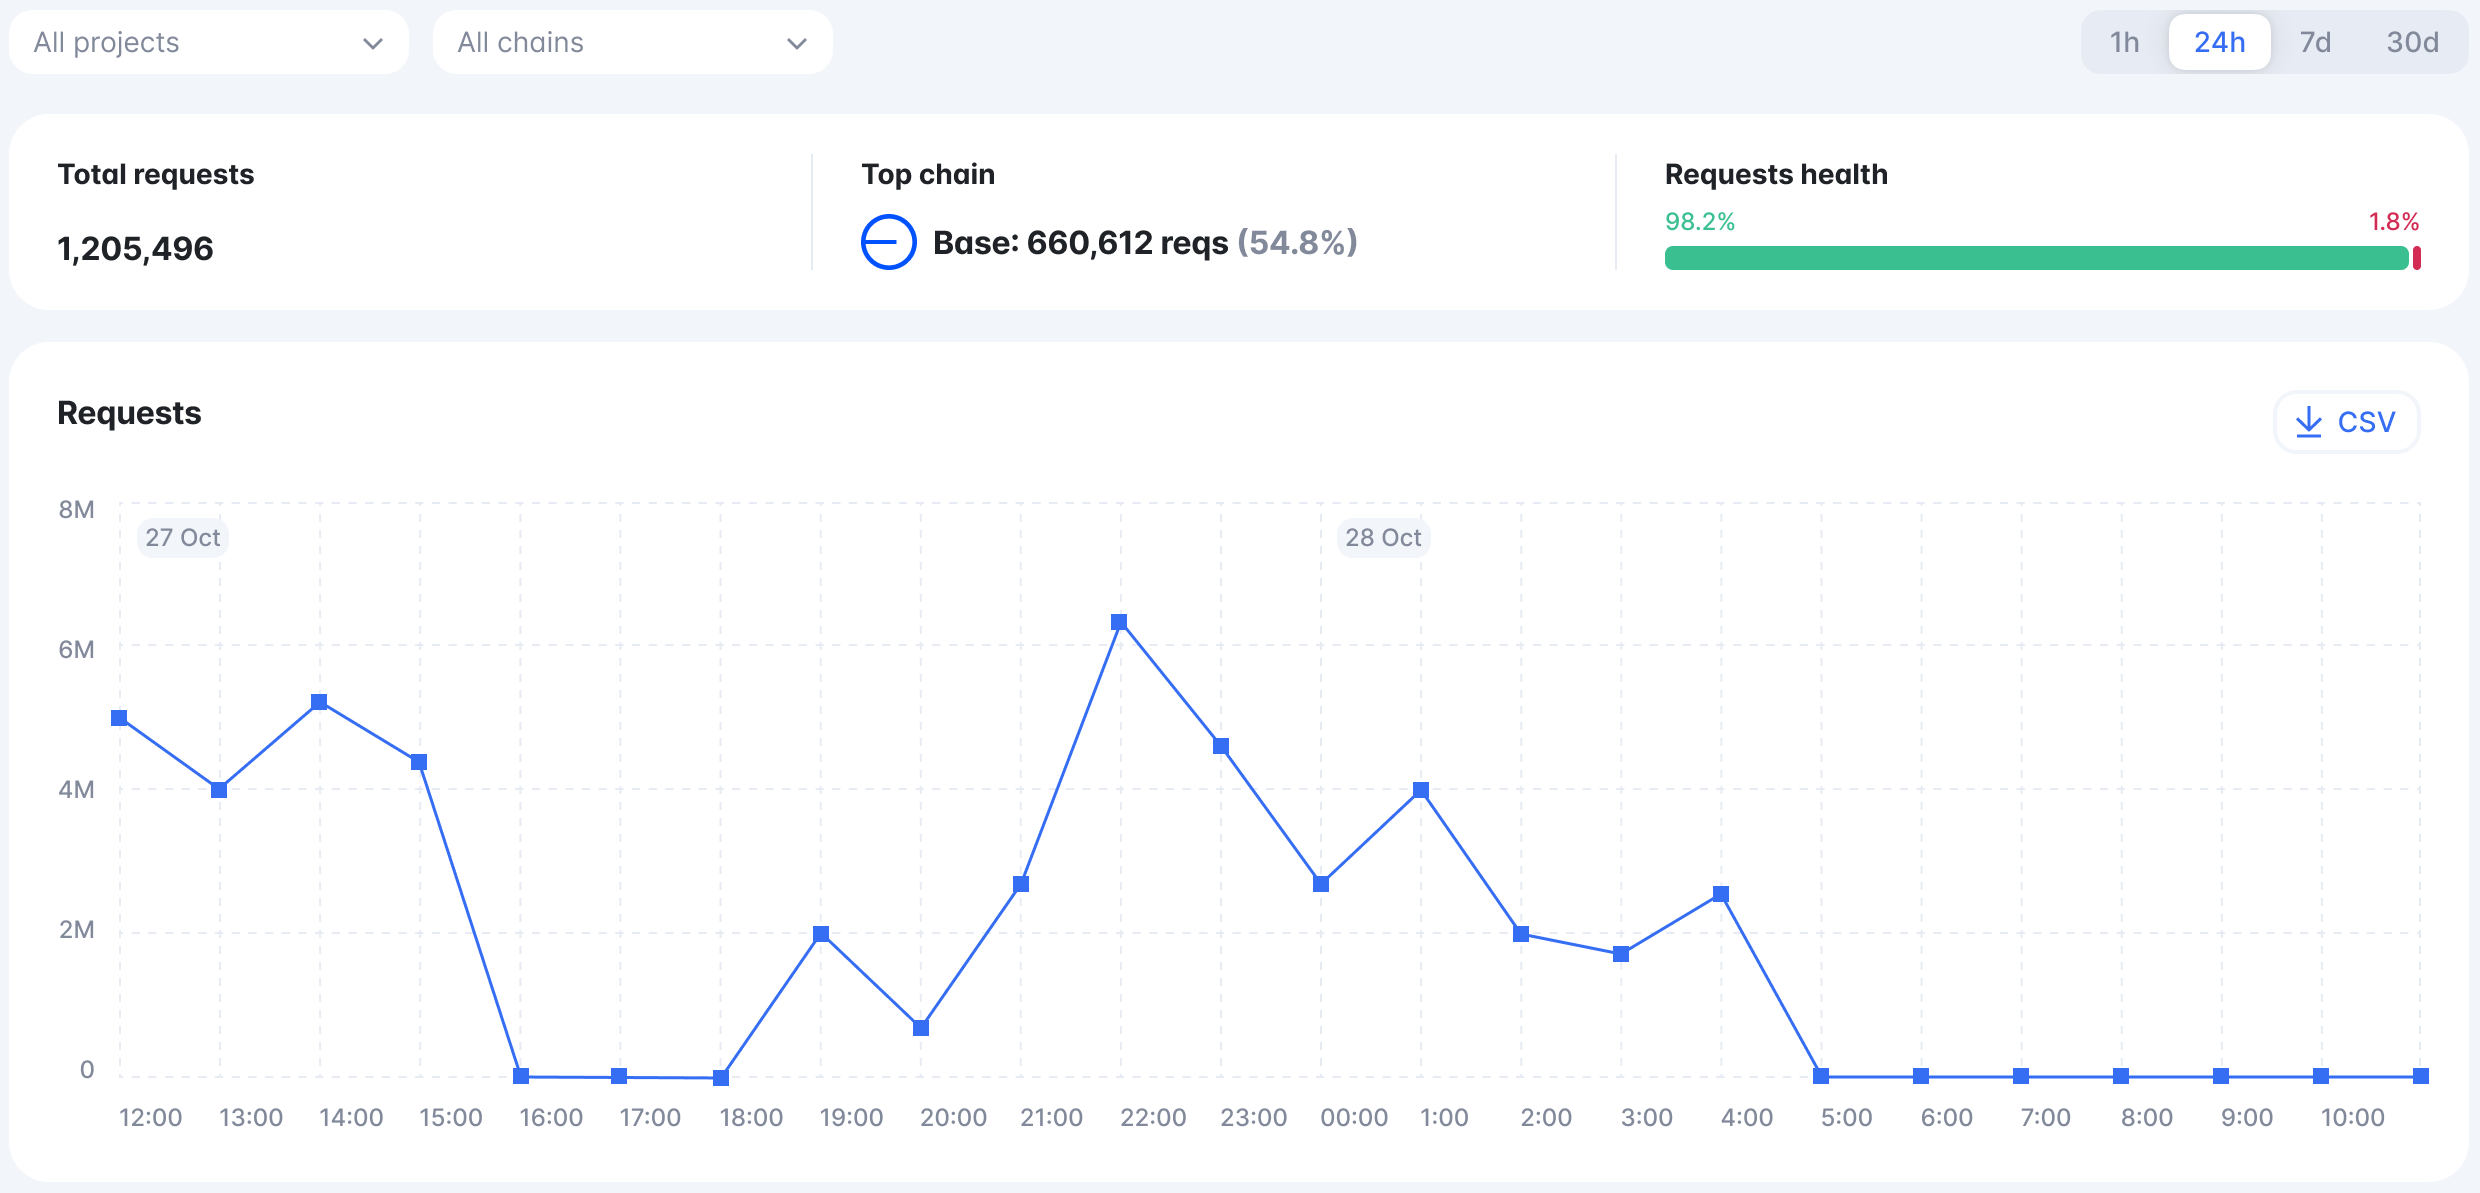
In Statistics, you can monitor the following data:
- Total Requests: a number of total requests.
- Top chain: the most queried chain.
- Requests health: the overall requests' success-to-failure rate based on our node performance.
- Requests: a diagram of requests.
- Requests overview info on requests filtered by one of the parameters — projects, chains, IPs, countries, and methods.
- Requests health breakdown: a detailed node distribution of success and failure requests.
- Usage History: a number of chain requests by month.
Settings
Available for both Freemium and Premium users.
To open the Settings pane, follow these steps:
- Sign in to the Web3 API (opens in a new tab) platform.
- In Navigation, click Settings and select one of the submenus to work with:
- Platform: define general Web3 API platform settings.
- Platform Swagger: interact with the platform's internal endpoints in Swagger UI.
- Notifications: manage Email, Telegram, and Slack notifications for your personal or team account.
Platform
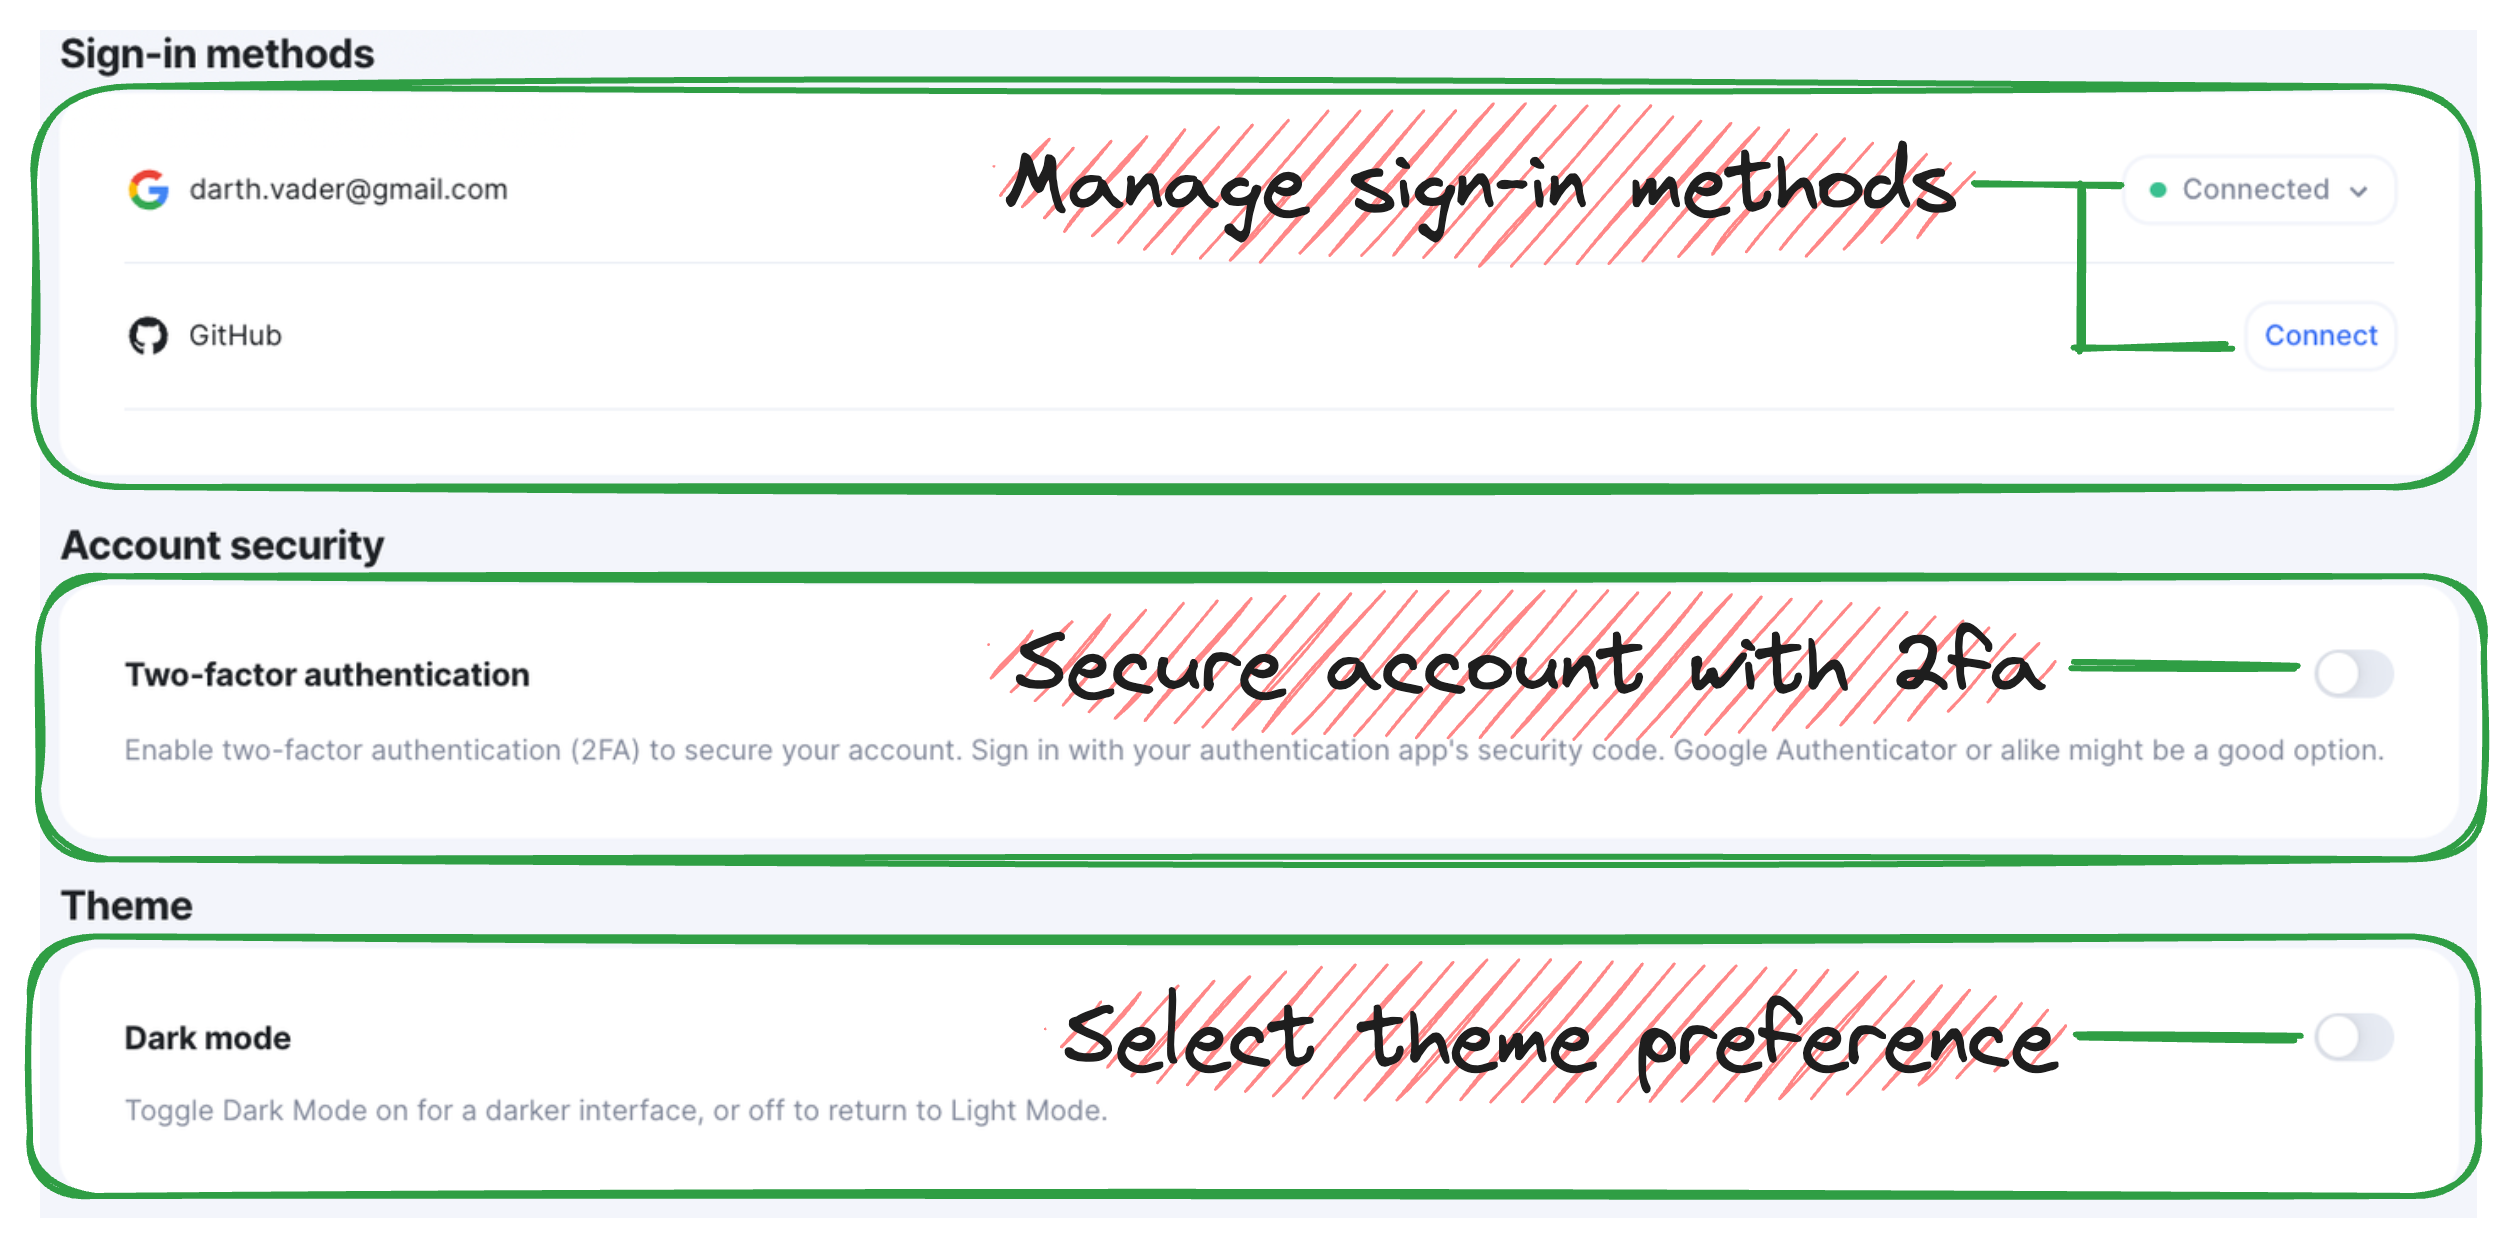
In Settings > Platform, the following actions are available for you:
- Sign-in methods: manage Google or GitHub sign-in methods associated with your account.
- Account security: Secure account with two-factor authentication.
- Theme: Select theme preference — dark/light.
Billing
Available for both Freemium and Premium users.
To open the Billing pane, follow these steps:
- Sign in to the Web3 API (opens in a new tab) platform.
- In Navigation, click Billing to open the corresponding pane.
Congrats — you can now check your balance, deposit funds into your account, see payments history, and expenses chart.
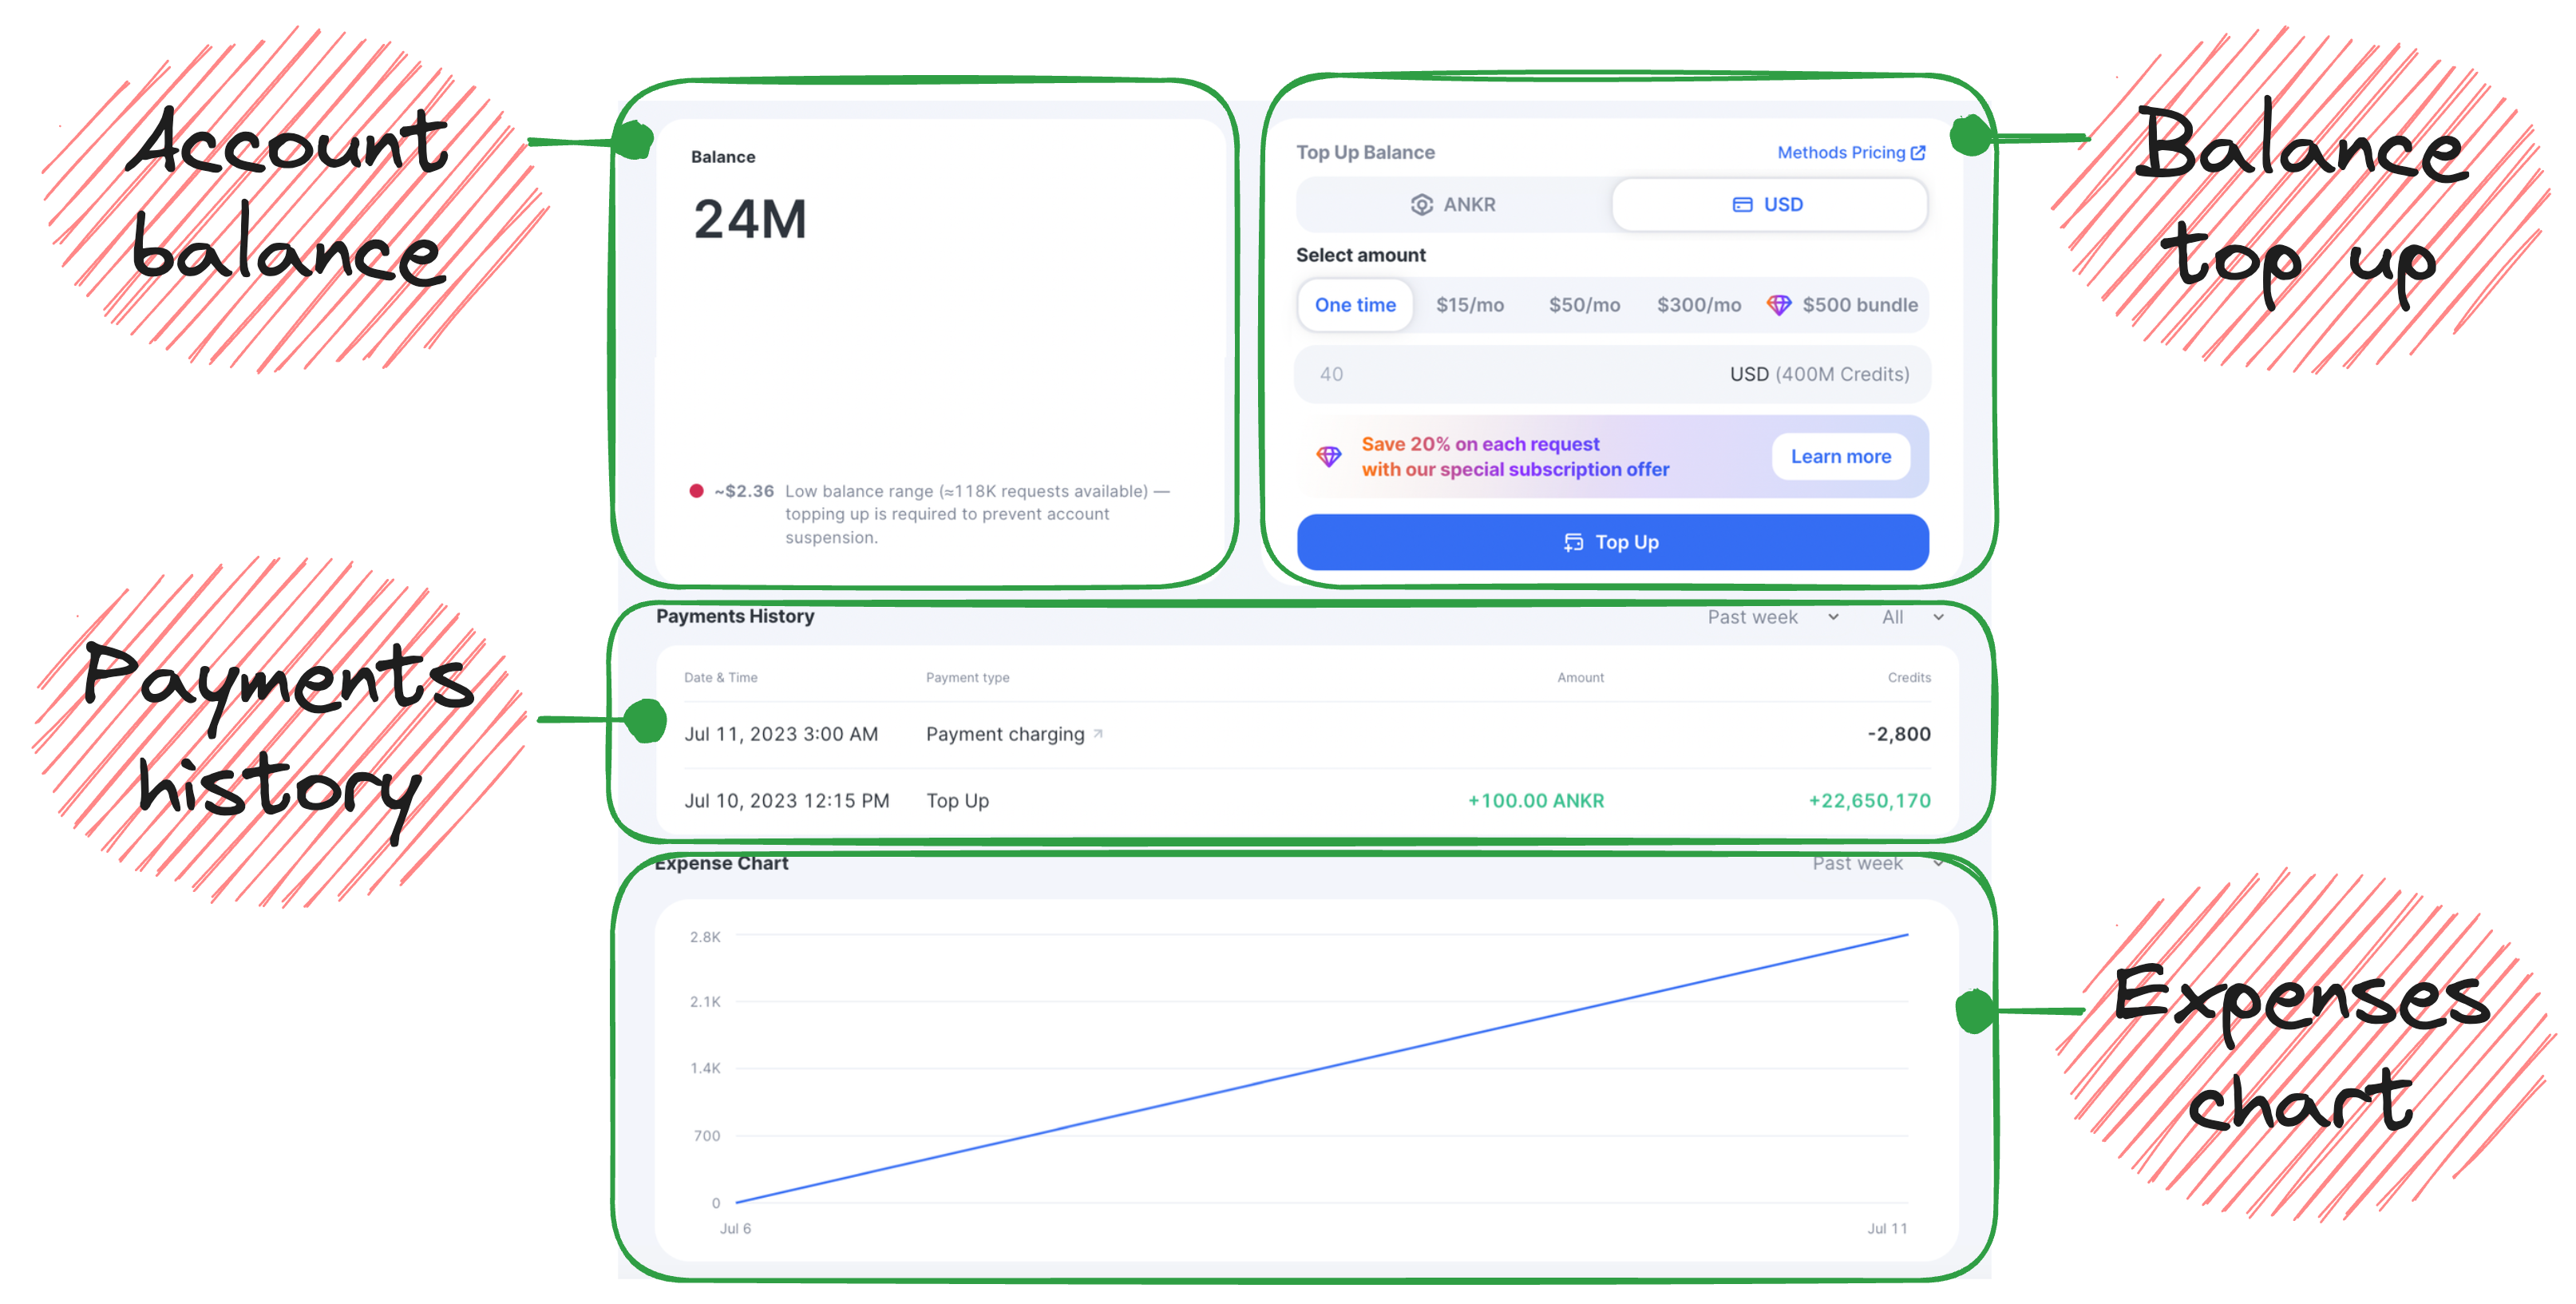
In Billing, the following actions are available for you:
- Account balance: check your account balance for API credits left and see if you need to top it up.
- Payments: deposit funds into your account.
- Payments history: check your history of funds depositing.