Build and Deploy A Rentable NFT Smart Contract On Optimism
NFTs are one of the most interesting things to have happened around digital ownership and the creator economy. They have opened a whole new world of possibilities for artists and developers alike.
NFTs are also expensive, though. Most people cannot afford to buy an NFT just to get access to a certain community or just to use it as a profile picture on Twitter.
If buying them is out of the question, what if you could rent them? What if you could only pay a fraction of the price and still be able to “use” the NFT everywhere in web3? That's exactly what we are going to talk about and build in this article!
Building A Rentable NFT
We are going to be building a rentable NFT collection. By “rentable”, we mean that any NFT from this collection can be rented out to someone else by its owner for a certain time period. During this rental period, the account renting the NFT can “use” it but cannot sell it or perform any destructive actions, like transfer or burn.
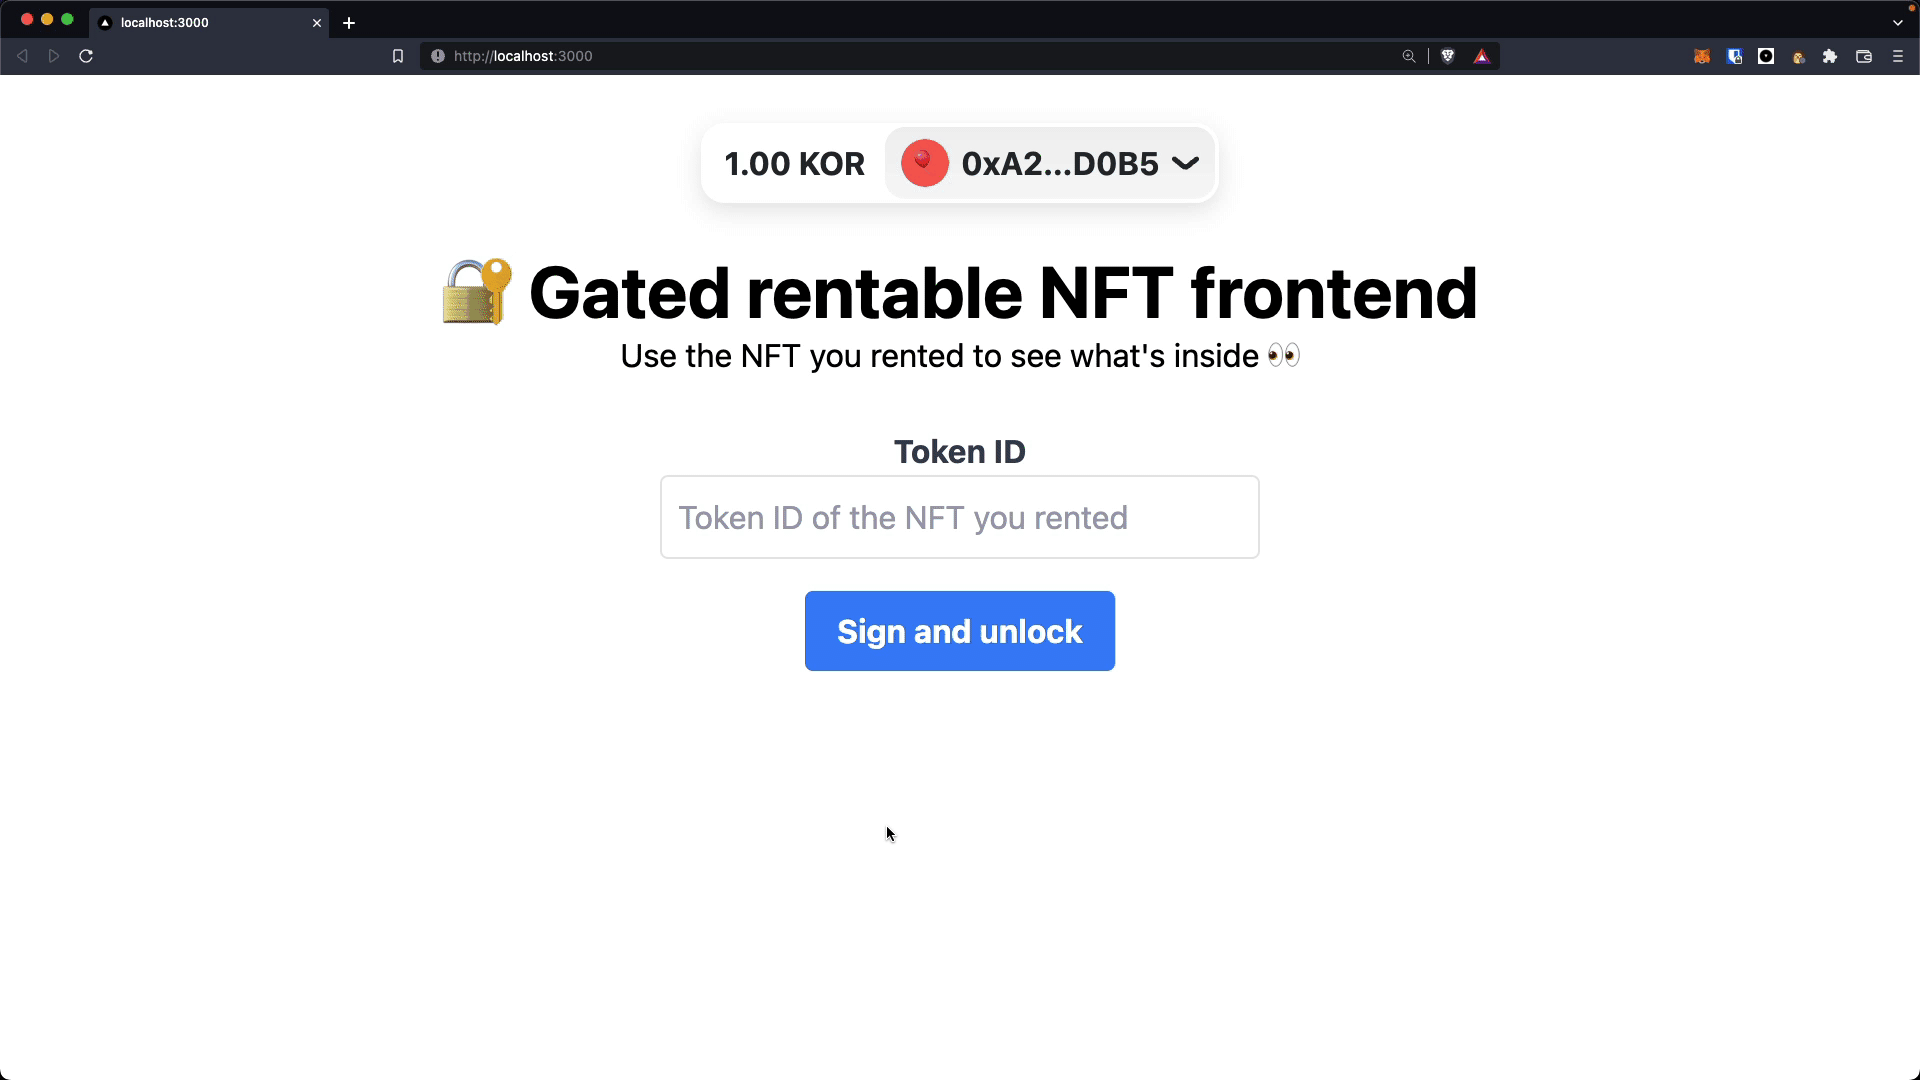
To test out our rentable NFTs, we will be using a gated frontend that gives you access to some content depending on whether you have rented a given NFT or not.
To make these NFTs even more accessible, we will be deploying them to the Optimism’s Kovan Testnet. Optimism is an extremely powerful Layer-2 scaling solution for Ethereum, and if you’d like to read more about them check Optimism’s Website.
Before we get into writing the smart contract, let's first discuss a standard for rentable NFTs that already exists - EIP-4907. We will be building our NFT collection on top of this standard.
EIP-4907: The Rental NFT Standard
Ethereum Improvement Proposal (EIP) 4907 discusses a new standard called ERC4907 which is an extension of the ERC721 standard. For some context, the ERC721 standard is the most commonly used standard for Non-Fungible Tokens (NFTs).
ERC4907 proposes an additional role called (user) which can be granted to addresses, and a time where the role is automatically revoked. The user role represents permission to 'use' the NFT, but not the ability to transfer it or set users. – From the official EIP-4907 doc - (https://eips.ethereum.org/EIPS/eip-4907)
In other words, the ERC4907 NFT standard makes it possible for you to “rent out” the utilities unlocked by your NFT to another address. This is made possible by adding a new role to the NFT.
For example, as mentioned in the EIP itself, rentable NFTs can be leveraged heavily in projects where NFTs are used to manage the ownership of virtual real estate or “virtual land”.
Think of a Metaverse project like Voxels where in order to purchase land in the virtual world, you need to purchase a corresponding NFT. Owning the NFT makes you the owner of that piece of land.
Just like IRL real estate, the ERC4907 NFT standard would let land owners rent out their land. This lets land owners create some passive revenue from their virtual assets and makes virtual land more accessible by lowering the barrier in terms of the money required. It's a win-win situation!
Now that we have got a gist of the ERC4907 standard, let's start building!
Project Setup
We will be using Hardhat to bootstrap our local development environment. Make sure you have NodeJS installed!
Let's first create an empty folder for our project.
mkdir optimism-rentable-nfts && cd optimism-rentable-nfts;
Initialize Project Using Hardhat
We'll now use the super convenient scaffolding CLI tool provided by Hardhat to set up some boilerplate for our project. Run this in your terminal:
# /optimism-rentable-nfts
npx hardhat;
Select Create a Javascript project when asked and say yes to all the remaining questions. The CLI tool will now set up the boilerplate and install dependencies for us.
Once that's done, we need to install one last dependency.
# /optimism-rentable-nfts
npm install @openzeppelin/contracts;
OpenZeppelin is an extremely handy library containing implementations of some common standards like ERC20 and ERC721. We will need these contracts later on.
Writing The Smart Contract
First, open your project in a code editor of your choice and create three new, empty files inside of the contracts folder.
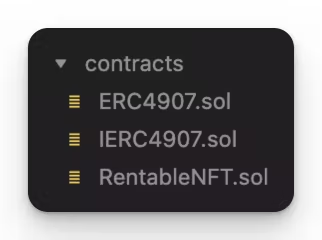
IERC4907.sol
The IERC4907.sol file will contain the Solidity interface for the ERC4907 standard including Natspec & OpenZeppelin interfaces. This means that this file will contain the skeleton or blueprint of the ERC4907 implementation.
Copy the entire contents of this file and paste it in your IERC4907.sol file. We don't need to touch this file again.
File: ./contracts/IERC4907.sol
// SPDX-License-Identifier: CC0-1.0

pragma solidity ^0.8.0;

interface IERC4907 {
    // Logged when the user of a token assigns a new user or updates expires
    /// @notice Emitted when the `user` of an NFT or the `expires` of the `user` is changed
    /// The zero address for user indicates that there is no user address
    event UpdateUser(uint256 indexed tokenId, address indexed user, uint64 expires);

    /// @notice set the user and expires of a NFT
    /// @dev The zero address indicates there is no user
    /// Throws if `tokenId` is not valid NFT
    /// @param user  The new user of the NFT
    /// @param expires  UNIX timestamp, The new user could use the NFT before expires
    function setUser(uint256 tokenId, address user, uint64 expires) external ;

    /// @notice Get the user address of an NFT
    /// @dev The zero address indicates that there is no user or the user is expired
    /// @param tokenId The NFT to get the user address for
    /// @return The user address for this NFT
    function userOf(uint256 tokenId) external view returns(address);

    /// @notice Get the user expires of an NFT
    /// @dev The zero value indicates that there is no user
    /// @param tokenId The NFT to get the user expires for
    /// @return The user expires for this NFT
    function userExpires(uint256 tokenId) external view returns(uint256);
}
ERC4907.sol
The ERC4907.sol file will contain the full implementation of the ERC4907 standard. We need this file because we will be 'extending' our actual NFT collection contract off of the ERC4907 standard.
Copy the entire contents of this file and paste it in your ERC4907.sol file. You may notice that you are copying the source code from my repo instead of directly from the EIP like we did with IERC4907.sol. This is because we have to make some adjustments to the original ERC4907.sol file in order to compile it and use it in our project. Specifically, I had to add the override keyword to some functions to make them work. You can see the original unmodified source code here!
We have to do this manually because EIP-4907 has not been accepted yet as a standard and isn't a part of any libraries like OpenZeppelin.
Let's briefly go through some of the important parts of the ERC4907 source code.
The functions we want to be paying attention to are setUser and userOf.
setUser
File: ./contracts/ERC4907.sol
/// @notice set the user and expires of a NFT
/// @dev The zero address indicates there is no user
/// Throws if `tokenId` is not valid NFT
/// @param user The new user of the NFT
/// @param expires UNIX timestamp, The new user could use the NFT before expires
function setUser(uint256 tokenId, address user, uint64 expires) public virtual{
    require(_isApprovedOrOwner(msg.sender, tokenId),"ERC721: transfer caller is not owner nor approved");
    UserInfo storage info =  _users[tokenId];
    info.user = user;
    info.expires = expires;
    emit UpdateUser(tokenId,user,expires);
}
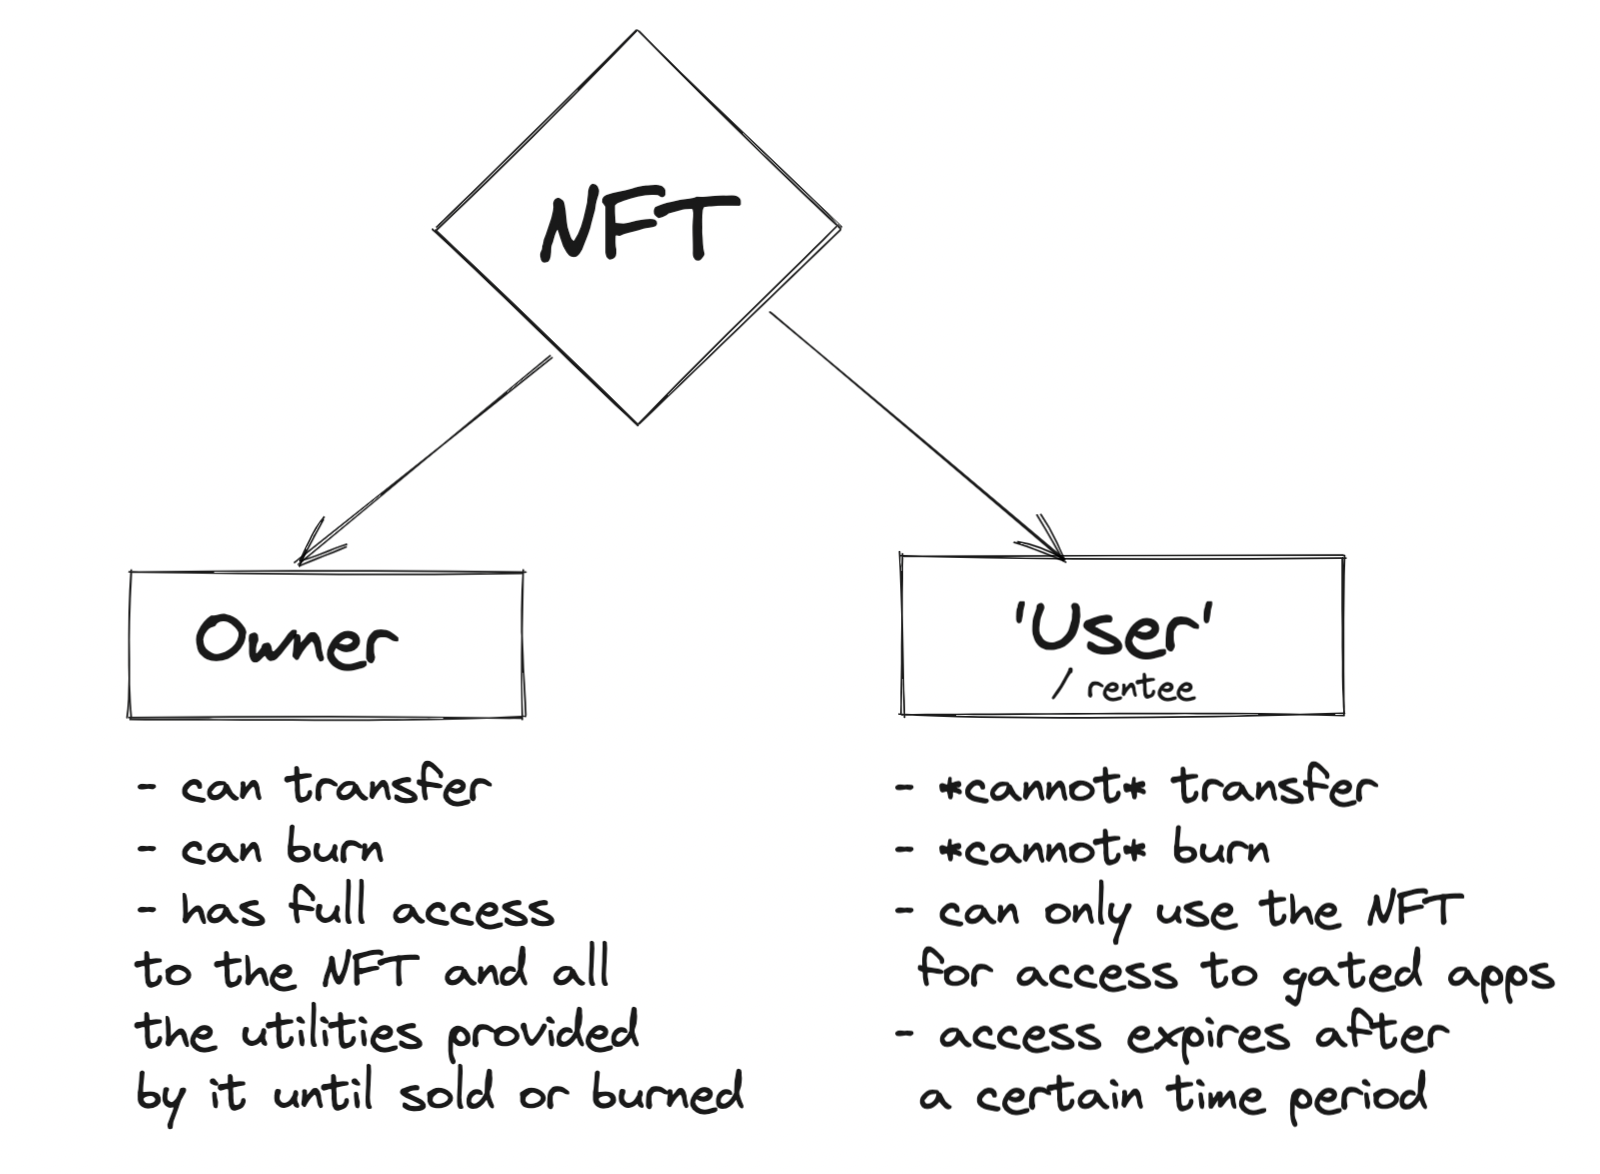
As discussed earlier, the ERC4907 token standard extends the ERC721 standard and manages two roles for each token
- The owner (rentee) of the token
- The user (renter) of the token
Just to recap, accounts with the user role can use the token but cannot perform any destructive actions like transfer or burn.
The setUser function lets owners rent out their NFT to another account. It can only be called by token owners (or “approved” accounts).
The function then sets the info struct in the contract with the newly set user and expires values - user being the address we want to rent out the NFT to and expires being the block timestamp when we want the renting period to end. I definitely recommend reading up on Ethereum Block Timestamps.
A key detail that we don't want to miss is that the setUser does not require a payment in the form of ETH or any other tokens in order to run. This is because it can only be called by the owner and, well, you are not going to be the one paying if you are renting your NFT out!
It should be the user who should have to pay a fee. This is why if you want to use the ERC4907 token standard then you would have to use the setUser function as a base and build your own payment functionality on top of it.
Let's move on to the userOf function for now.
userOf
Let's say you have rented out an NFT to a person named Bob.
Now, how does Bob actually use your NFT? How does Bob get access to, for example, the token gated communities or content your NFT gives access to?
To answer that, we need to understand how most token gated communities define the criteria for access. The community is going to take advantage of the balanceOf function, that comes built into the ERC721 our contract extends, which allows it to verify a specific wallet owns a certain amount.
With ERC4907, these gating tools will still be able to correctly grant access to the original owner. If we look back the ERC4907.sol file we can see that it extends the ERC721 standard, which brings with it all of its default functionality. This is why it has the exact same balanceOf functionality that comes with ERC721.
This token gating functionality won’t work out of the box for users (renters) of the NFT because:
- The balanceOf function only works for owners
- There is no counterpart of balanceOf for users
This is where the userOf function comes in.
File: ./contracts/ERC4907.sol
/// @notice Get the user address of an NFT
/// @dev The zero address indicates that there is no user or the user is expired
/// @param tokenId The NFT to get the user address for
/// @return The user address for this NFT
function userOf(uint256 tokenId)public view virtual returns(address){
    if( uint256(_users[tokenId].expires) >=  block.timestamp){
        return  _users[tokenId].user;
    }
    else {
        return address(0);
    }
}
When we send a tokenId to userOf it returns the wallet address of its renter.
Because of this userOf function, token gating tools can also support accounts who have rented NFTs! All they would have to do is also call the userOf function and check if the account trying to get access has rented an NFT.
The only weird quirk here is that you need to pass in a tokenId to userOf.
Now that we have a pretty decent understanding of the inner workings of the ERC4907 token standard, let's move on to writing the source code for our rentable NFT collection!
RentableNFT.sol
This file will contain the source code for our NFT collection's smart contract. This is everything we’ll need to get our ERC4907 NFT collection up and running:
File: ./contracts/RentableNFT.sol
// SPDX-License-Identifier: MIT
pragma solidity ^0.8.0;

import "./ERC4907.sol";

// We are extending our contract from ERC4907. It lets us make our NFTs rentable and gives us access to functions like setUser and userOf.
contract RentableNFT is ERC4907 {
    mapping(uint256 => string) public tokenURIs;

    // We are accepting the collection's name and its symbol in our constructor. 1:1 copy of how it's done in an ERC721 contract.
        constructor(string memory _name, string memory _symbol)
        ERC4907(_name, _symbol)
    {}

    function mint(uint256 _tokenId, string memory _tokenURI) public {
        _mint(msg.sender, _tokenId);
        tokenURIs[_tokenId] = _tokenURI;
    }

        // This is where the ✨ magic ✨ happens. This function will let any owners rent out their NFTs. It internally calls the setUser function from the ERC4907 standard
    function rentOut(
        uint256 _tokenId,
        address _user,
        uint64 _expires
    ) public onlyOwner(_tokenId) {
        setUser(_tokenId, _user, _expires);
    }

        // Returns the tokenURI for a given _tokenId
    function tokenURI(uint256 _tokenId)
        public
        view
        override
        returns (string memory)
    {
        return tokenURIs[_tokenId];
    }

        // Checks if the account calling the function actually owns the given token.
    modifier onlyOwner(uint256 _tokenId) {
        require(
            _isApprovedOrOwner(msg.sender, _tokenId),
            "caller is not owner nor approved"
        );
        ;
    }
}
You might have noticed that the only way an NFT can be rented out right now is if the owner goes and calls this rentOut function. There is no way for a person looking to rent an NFT to pay a certain fee and get an NFT on rent without the owner having to intervene. We’ll go over this functionality near the end of the article.
That is all for the source code of our contract. Let's now write an automated test suite that tests the entire renting flow from start to finish so that we know that our new shiny rentable NFT collection actually does something!
Writing Tests For ERC4907
Tests! Who doesn't like writing some tests?
Delete the sample-test.js file in your tests directory and create a new file called tests.js.
Let's start by writing two utility functions that will come in handy.
File: ./test/tests.js
const { expect } = require("chai");
const { ethers, network } = require("hardhat");

// this function will deploy our NFT collection's contract and return an instance of the contract for us to interact with
const setupContract = async () => {
  const RentableNFT = await ethers.getContractFactory("RentableNFT");
  const rentableNFT = await RentableNFT.deploy("RentableNFT", "RNFT");
  await rentableNFT.deployed();
  return rentableNFT;
};

// this function will simply give us *full* access to two accounts a.k.a *'signers'*. Using these two accounts, we will be able to simulate two different accounts interacting with our contract in any way we want
const setupAccounts = async () => {
  const accounts = await ethers.getSigners();
  return [accounts[0], accounts[1]];
};
With this base, we can now structure what we want to test for different scenarios.
Let’s write the code for our test suite now.
File: ./test/tests.js
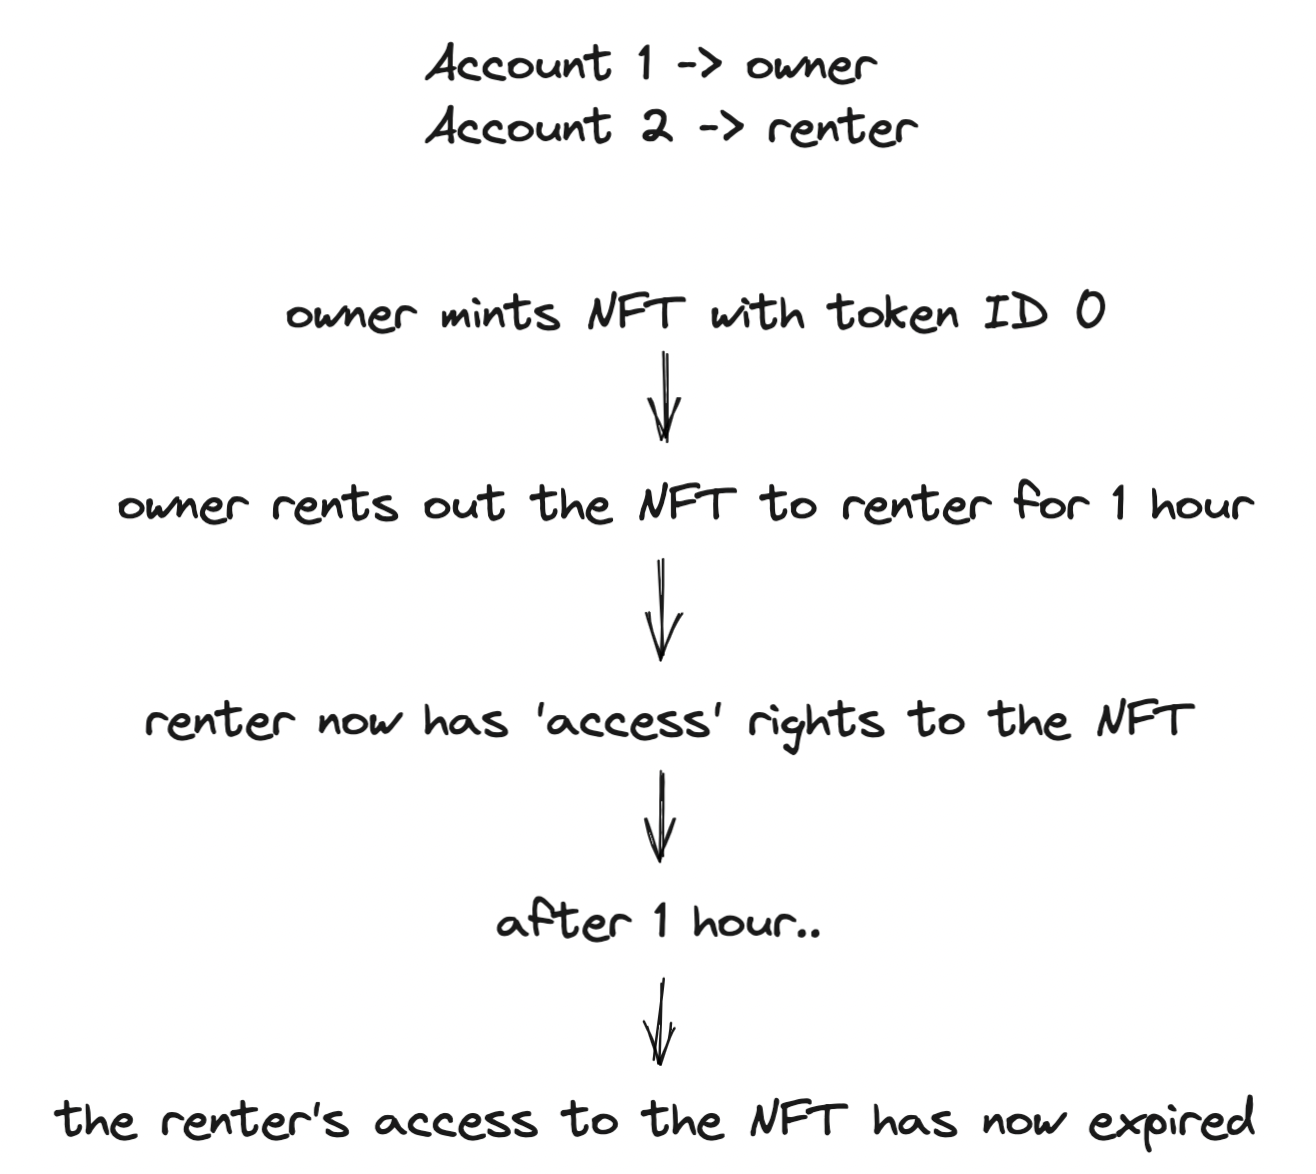
it("Rent flow ", async () => {
  const rentableNFT = await setupContract();
  const [owner, renter] = await setupAccounts();

  // mint tokenId 0 to owner. The .connect function lets us interact with the contract instance explicitly from an account of our choice. In this case, that account is owner.
    const tx = await rentableNFT.connect(owner).mint(0, "QmPf2x91DoemnhXSZhGDP8TX9Co8AScpvFzTuFt9BGAoBY");
    await tx.wait();

  // check owner of tokenId 0
    const ownerOf = await rentableNFT.ownerOf(0);
    expect(ownerOf).to.equal(owner.address);

  // rent the nft to renter for 1 hour
    const expiryTimestamp = Math.round(new Date().getTime() / 1000) + 3600;
    const tx2 = await rentableNFT
      .connect(owner)
      .rentOut(0, renter.address, expiryTimestamp);
    await tx2.wait();

  // check 'renter i.e. 'user' of tokenId 0
    const renterOf = await rentableNFT.userOf(0);
  expect(renterOf).to.equal(renter.address);

  // fast forward the chain to 2 hours later and check if the nft is still rented
    await network.provider.send("evm_increaseTime", [3601]); // 3601 -> 3600 seconds = 1 hour + 1 seconds
    await network.provider.send("evm_mine");

  // check renter i.e. 'user' of tokenId 0
    const renterOf2 = await rentableNFT.userOf(0);
    expect(renterOf2).to.not.equal(renter.address);
    expect(renterOf2).to.equal("0x0000000000000000000000000000000000000000");
});
We'll now run npx hardhat test and check if our entire flow works as intended.
The test might not pass in the first run. Just run it again. Sometimes it doesn’t manage to fast forward the chain successfully on the first go.
# /optimism-rentable-nfts
npx hardhat test

  ✔ Rent flow (85ms)

  1 passing (618ms)
And...of course, it does! We just tested the entire lifecycle of an ERC4907 rentable NFT. Woohoo! 🎉
Let's now try deploying our smart contract to a Tesnet!
Deploying To Testnet
We will be deploying our contract to the Optimism Kovan Testnet.
The great thing about Optimism is that even deploying something to the Optimism Mainnet is extremely cheap (a couple of dollars at most).
But we are going to do the right thing and not clog up the Mainnet with our temporary test contracts. That's what Testnets are for.
Instead of using Hardhat for the deployment, we are going to use Thirdweb Deploy. It is a tool that lets us deploy smart contracts without needing to deal with bare private keys. You can learn more about the tool here: https://portal.thirdweb.com/thirdweb-deploy
Let's get started by running npx thirdweb deploy in your terminal. Make sure you run this command from the root of your project.
# /optimism-rentable-nfts
npx thirdweb deploy
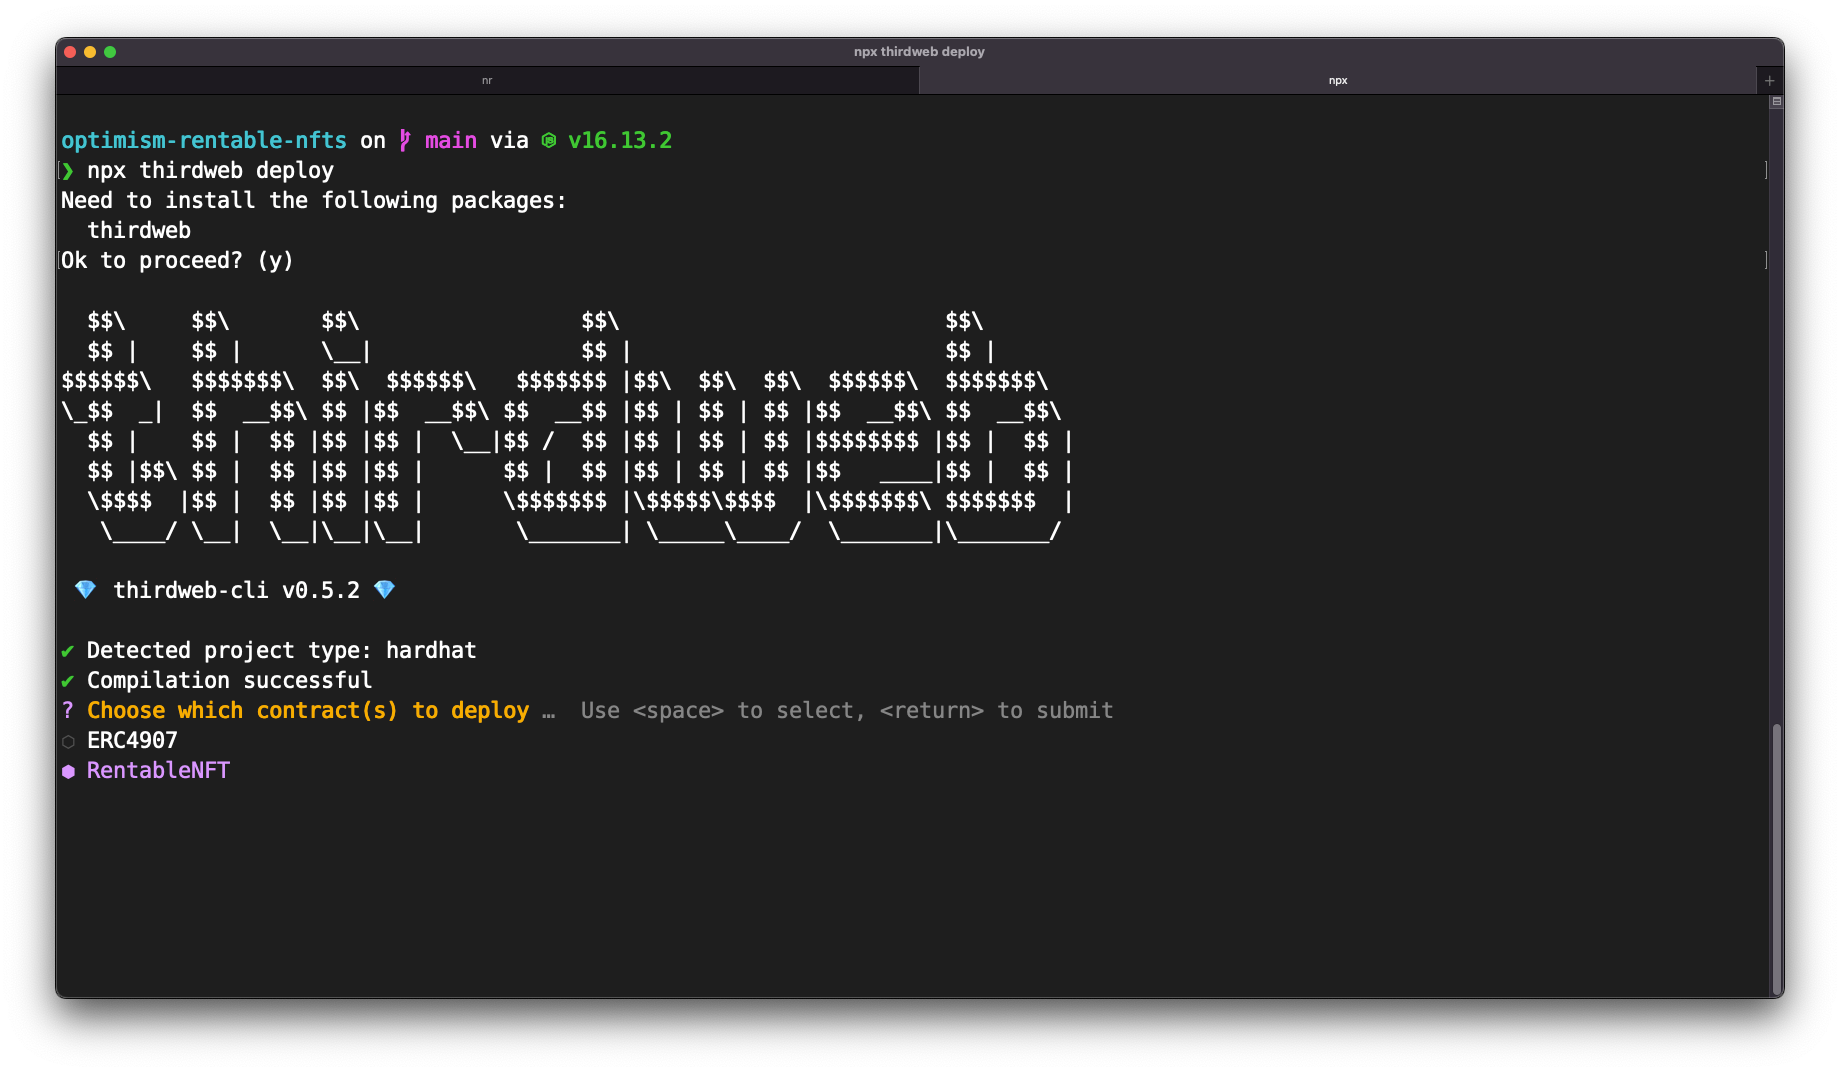
Select only the RentableNFT contract when prompted. We don't need to deploy the ERC4907 contract separately. If all goes well, you should see something like this show up in your browser:
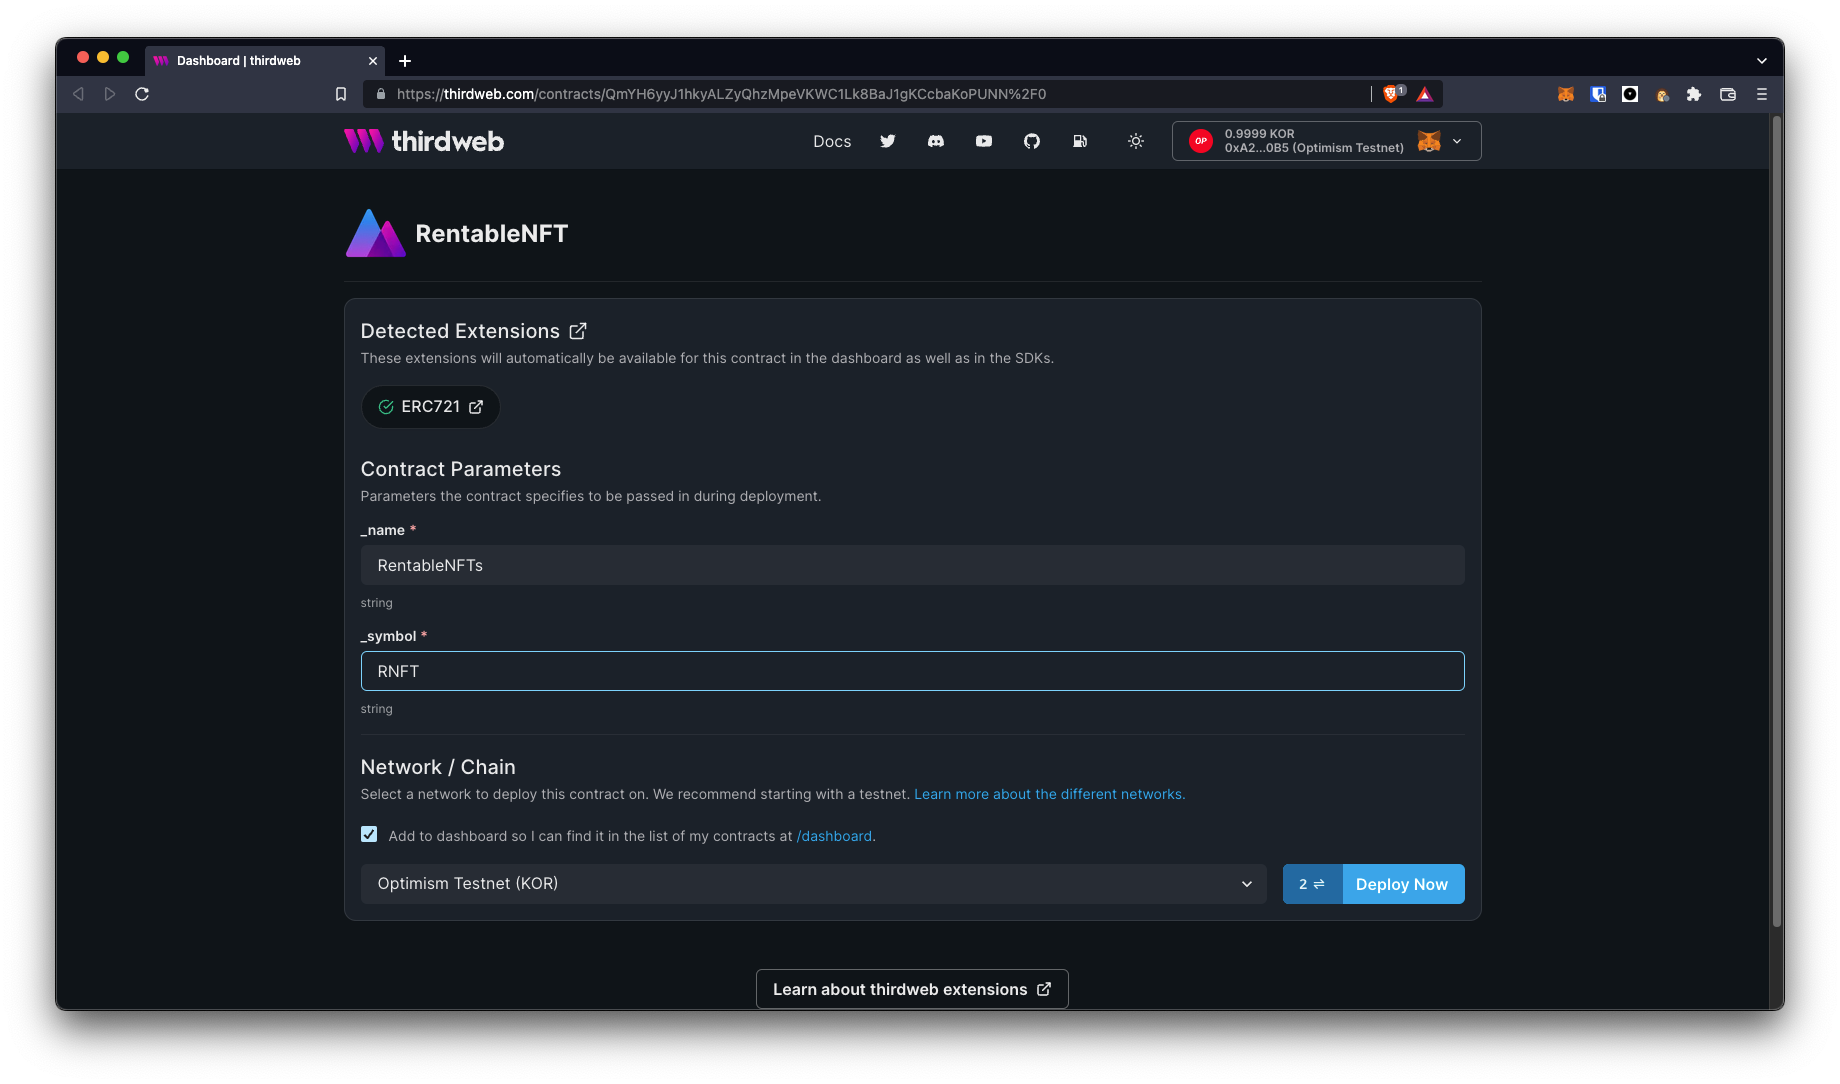
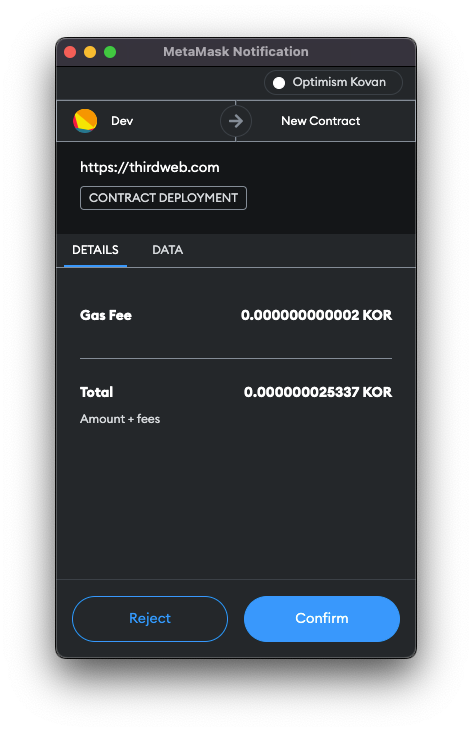
Fill in the contract's constructor parameters, select the Optimism Testnet from the Network dropdown and then click Deploy Now. You will see two transaction confirmation requests show up.
The first popup will be for the actual contract deployment. Make sure you confirm this one.
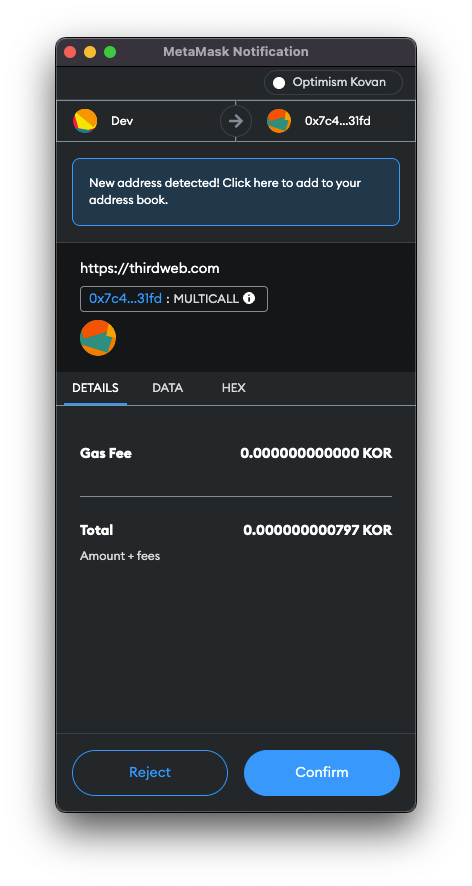
The second transaction is optional. This transaction will add your contract to Thirdweb's proxy so that you can access it from your Thirdweb dashboard later on. This does not give away any ownership of your contract to Thirdweb.
Once your contract gets deployed you should be redirected to the Contract Explorer which allows you to interact with the contract functions.
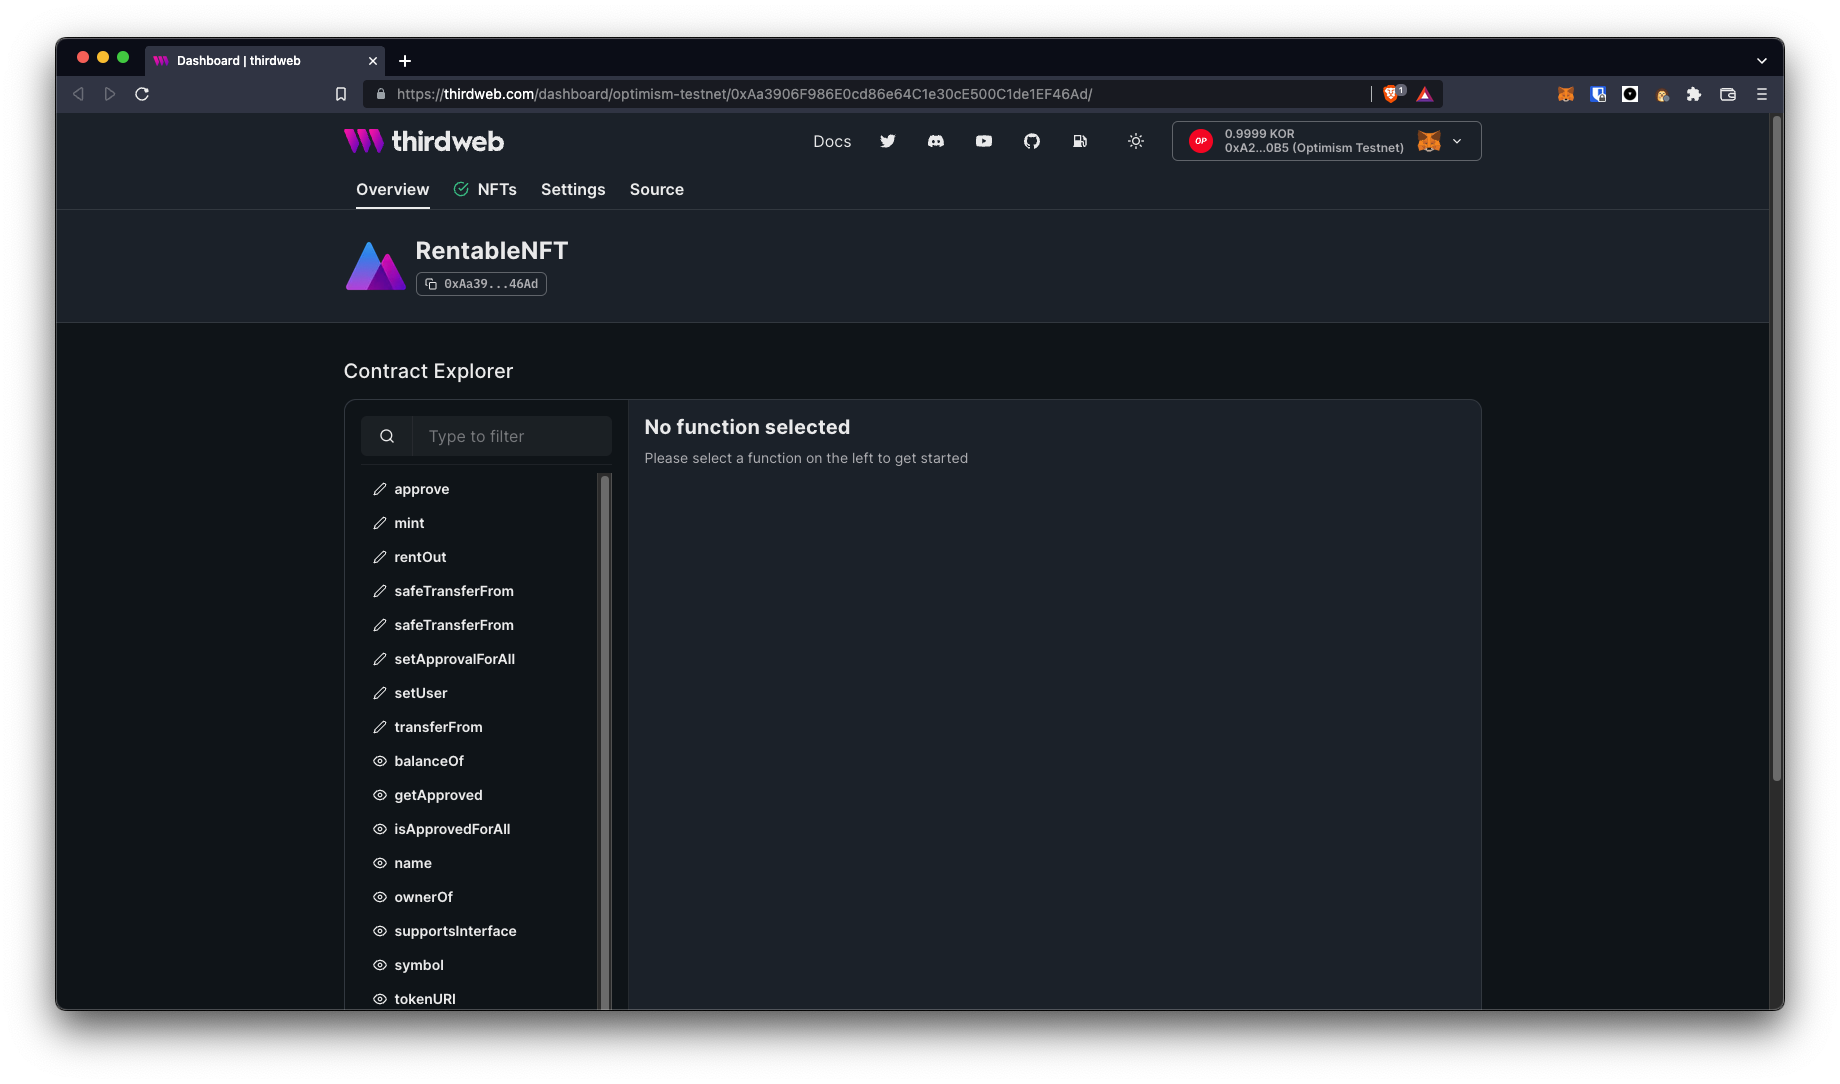
Make sure you copy your contract's address from the top. You will need it later on.
LFG! We just successfully deployed a rentable NFT collection to the Optimism Kovan Testnet!
You can go see your contract on Optimism's Testnet block explorer too.
Interacting With Our Deployed Contract
We are going to use the Thirdweb UI to interact with our contract and go through the entire renting flow we touched upon when we wrote all those tests.
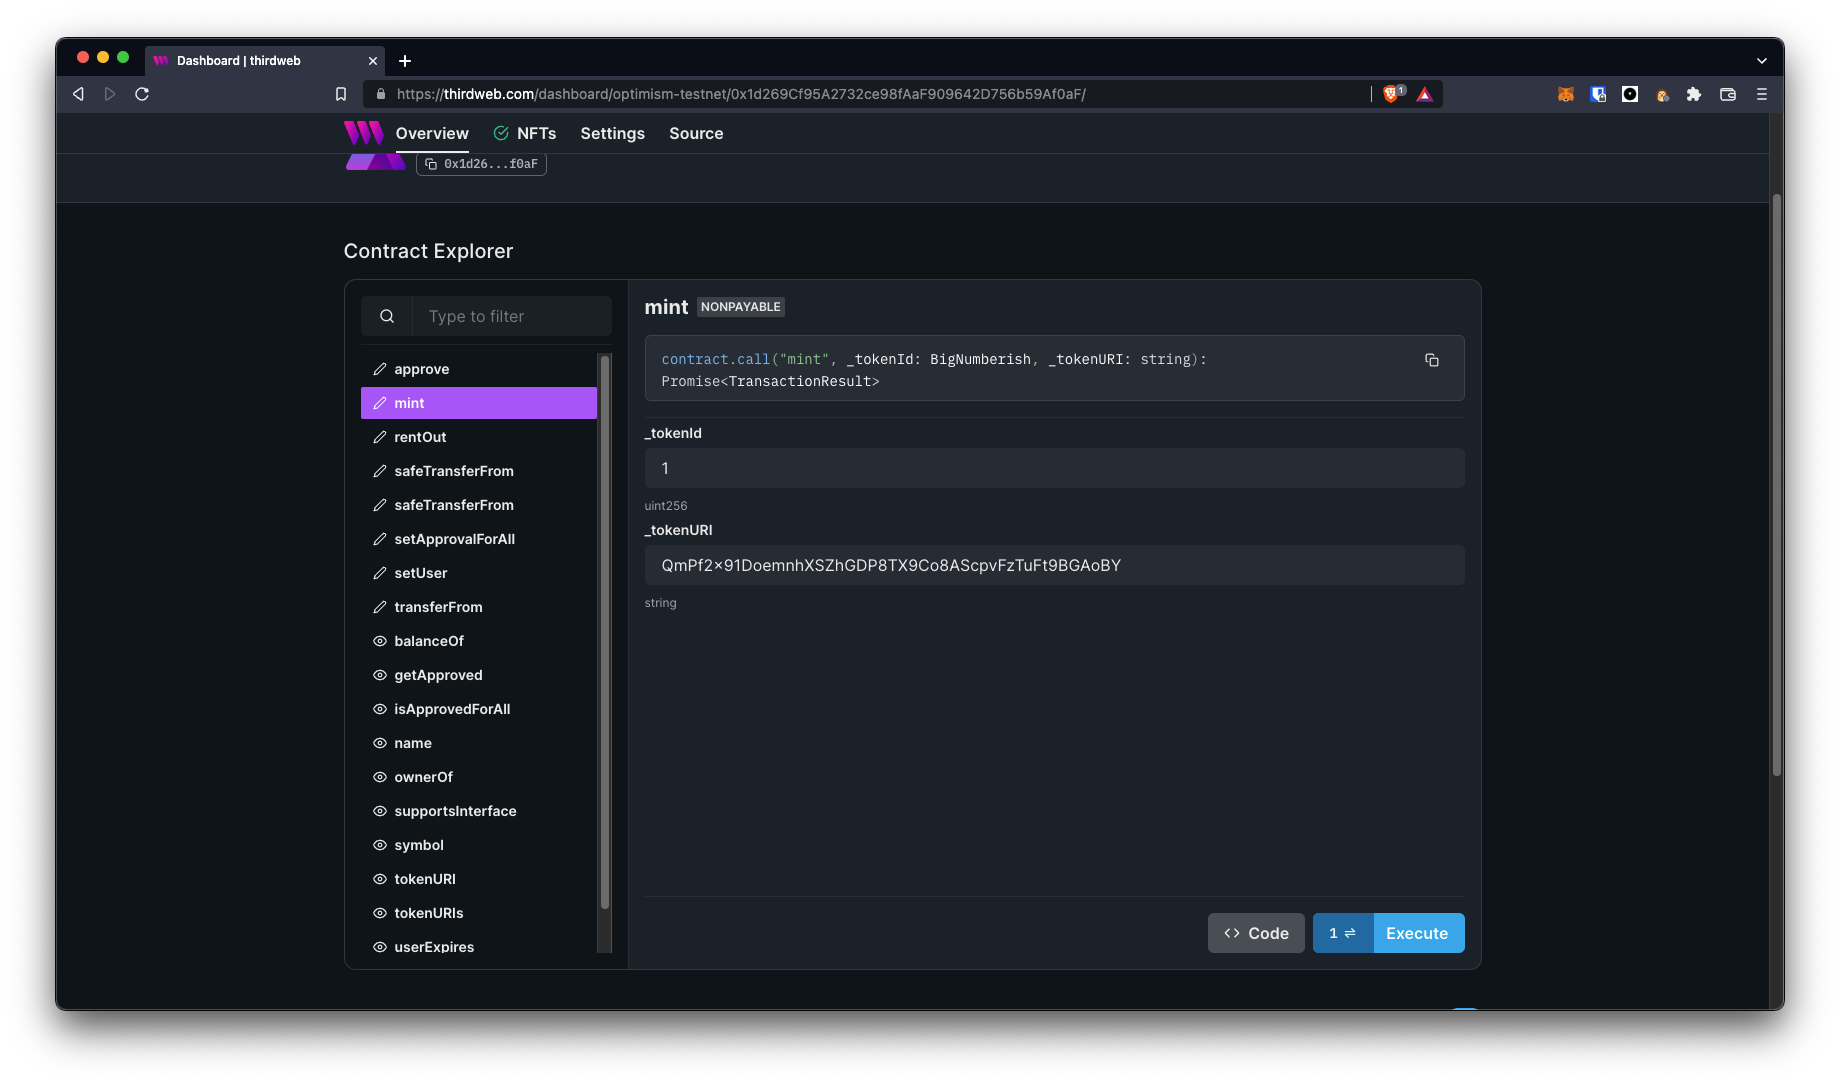
Let’s start by minting an NFT by selecting the mint function from the left sidebar, specifying a _tokenId and _tokenURI (our IPFS URL), and then clicking Execute.
Next, we are going to rent this NFT out to an account. Make sure you have access to this account though! We will use this account to interact with that gated frontend we talked about at the beginning.
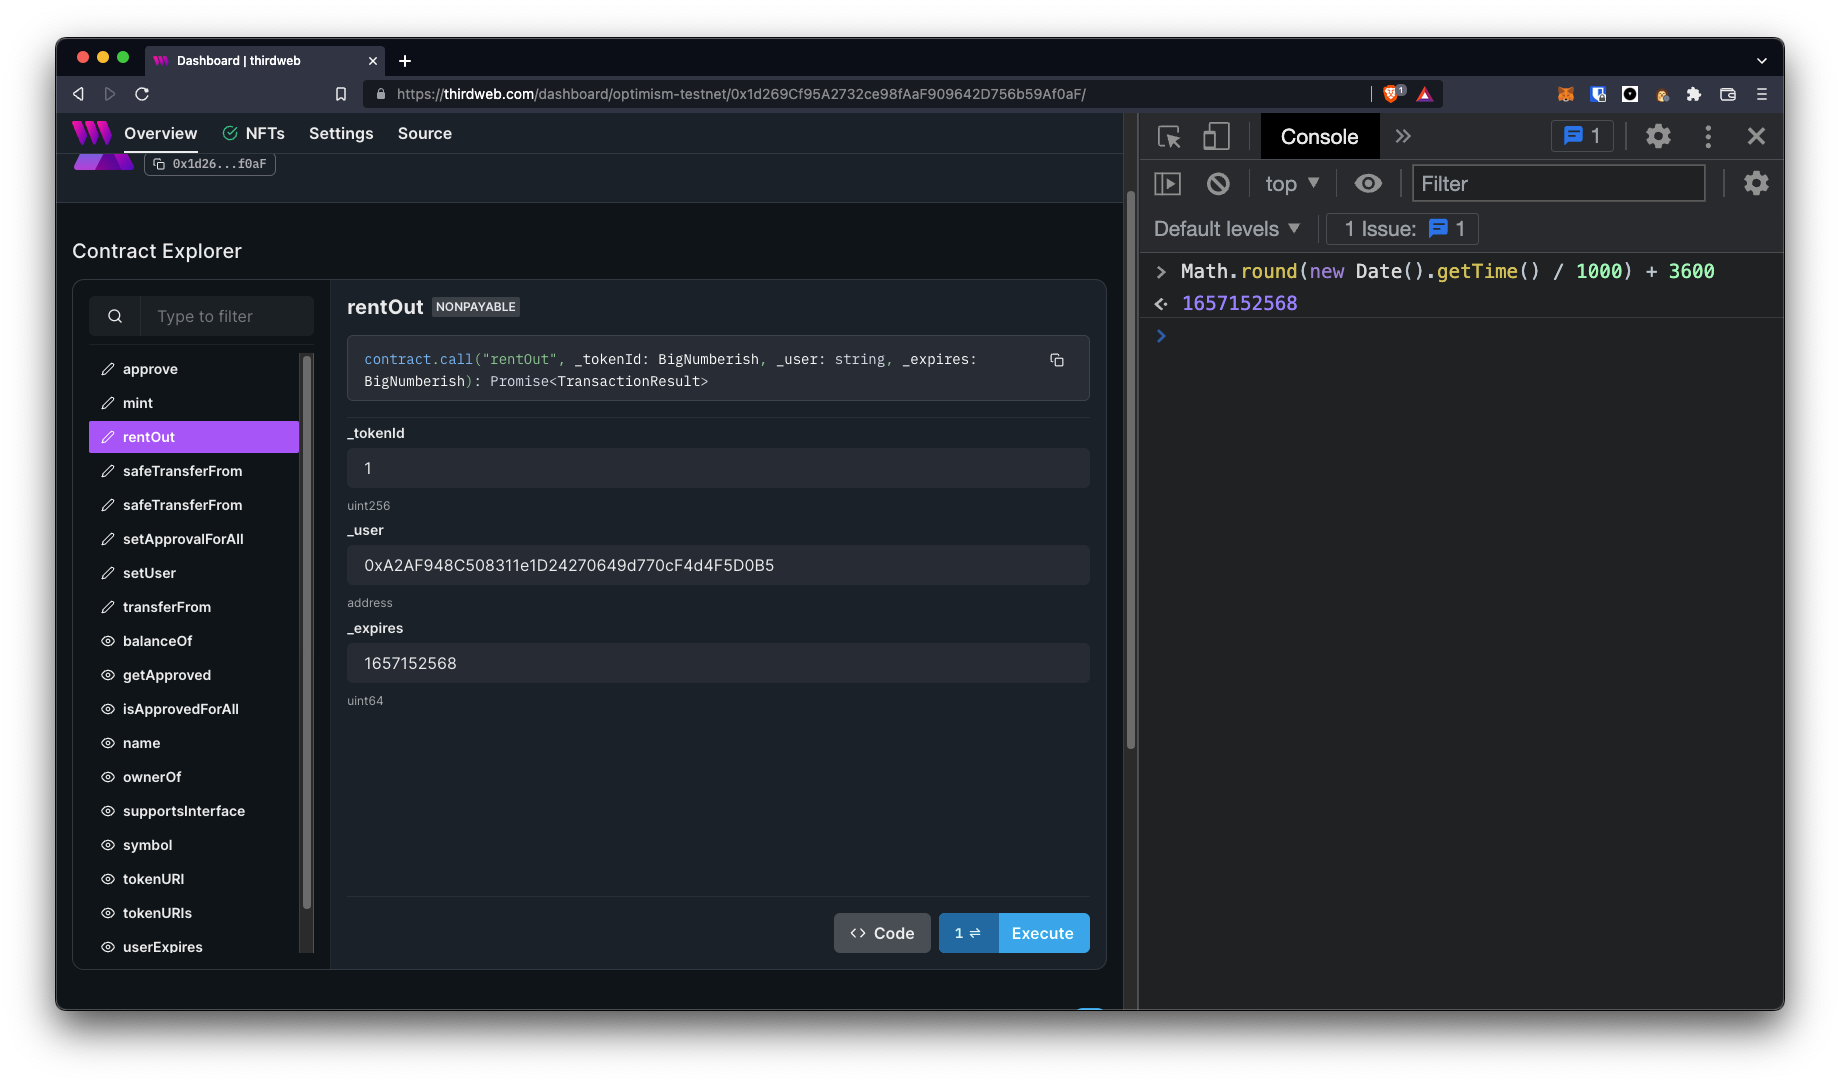
Let’s rent out the NFT by selecting the rentOut function from the left sidebar, specifying a _tokenId, a _user and an _expires timestamp.
You can run this piece of code in your browser’s console to get a timestamp for 1 hour from now.
Math.round(new Date().getTime() / 1000) + 3600
Additionally, you can use Node as well.
node;
> Math.round(new Date().getTime() / 1000) + 3600
> 1657242017
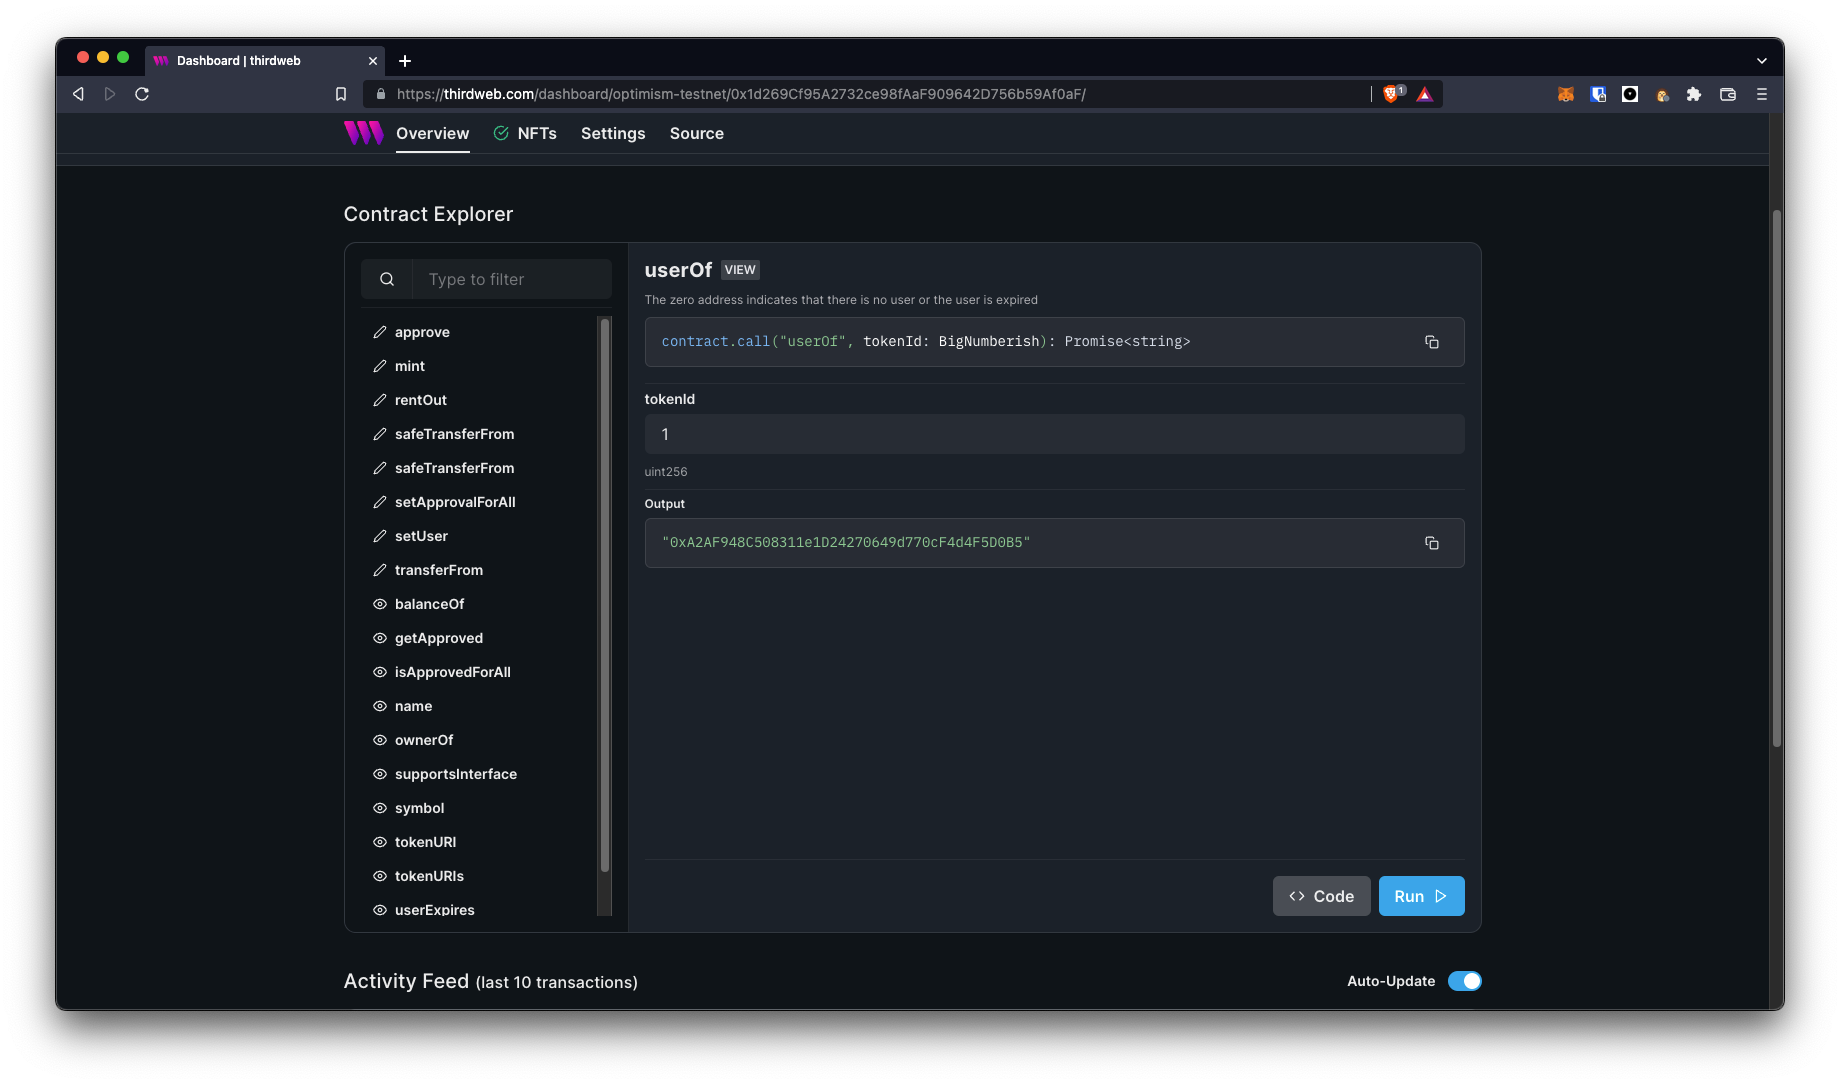
Check if the NFT was successfully rented out by calling userOf function for the token with token ID 1.
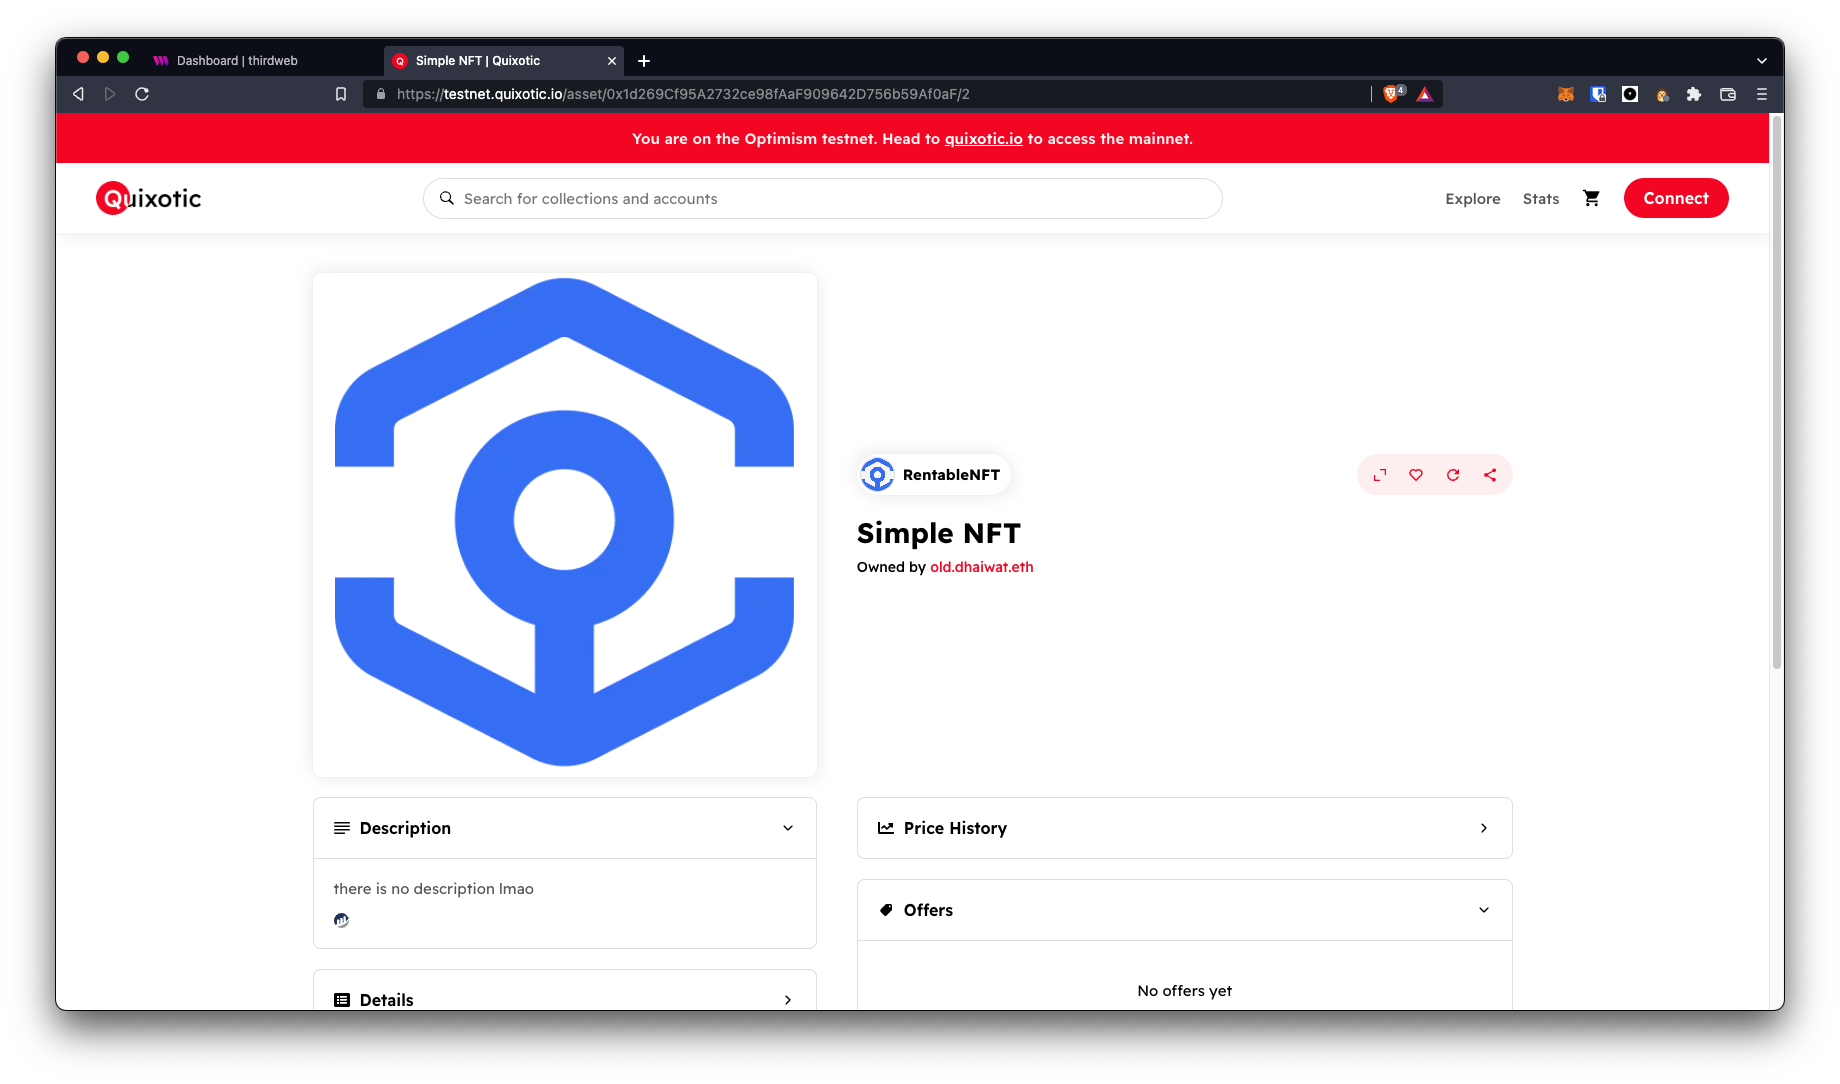
You can also go see your NFT on Quixotic, which is an NFT marketplace for Optimism. Insert your contract address and token ID in this link to view yours:
https://testnet.quixotic.io/asset/CONTRACT_ADDRESS/TOKEN_ID
Here’s an NFT that was already deployed and minted.
https://testnet.quixotic.io/asset/0x1d269Cf95A2732ce98fAaF909642D756b59Af0aF/2
Seeing The Rentable NFTs In Action
We will now use the NFT we just rented for access to a gated frontend. It is a website that gives you access to some content if and only if you have rented an NFT from a certain ERC4907 NFT collection. This website will help you get a feel of a practical use case of the Rentable NFTs we just built.
To save you some time and efforts, I have already created this website for you. You can go clone this rentable nft gated frontend repo and follow the instructions in the README.md to get yourself up and running.
GitHub - Dhaiwat10/rentable-nft-gated-frontend
Connect with the wallet you rented your NFT to and you should be able to view the gated content!
NOTE: Try this again after a hour and you will notice that your rented NFT has now expired. It won't let you get to the gated content anymore.
Next Steps
A good next step after building this project would be to build a marketplace for these rentable NFTs. If you recall, the smart contract we wrote for our NFT collection doesn't let anyone get an NFT on rent on-demand. It requires the owner of the NFT to call a function that rents out the NFT.
Ideally, anyone looking to get an NFT on rent should be able to pay a certain fee and get it on rent without waiting on anyone else. This is why you need a marketplace smart contract that acts as a bridge between NFT owners and people looking to rent them.